Pages

Sunday, 28 December 2014

Burmese Sticky Rice Cake


Time to share with you another delicious recipe from the lovely cuisine of Myanmar. This sticky rice cake is so more-ish because it's incredibly tasty and not too sweet! Flavoured with peanuts, sesame seeds and coconut with the use of brown sugar to make a caramelised sticky treat. This is a nice one to get out for your new year celebrations, it's nice to bring in the new year by trying something new :)


Burmese Sticky Rice Cake

Ingredients
1 1/2 cups Thai sticky rice
2/3 cup brown sugar
1/3 cup sesame seeds
1/4 tsp salt
1/3 cup chopped peanuts
1/3 cup raisins (optional)
2 1/4 cups water
Handful of peanut halves
1/4 cup unsweetened desiccated coconut

To Make
1. Rinse the sticky rice with cold water and place in a large non stick saucepan. Add the brown sugar, sesame seeds, salt, chopped peanuts, raisins and water and bring to a boil. Once boiling, reduce the heat to the lowest setting and let cook, covered, for about 25 minutes. When it is done cooking it will have absorbed almost all of the water. Remove from the heat and let sit, covered, for 10 minutes.
2.  Lightly grease a 9 inch by 9 inch (or similar) size dish and line the bottom of it with non stick baking paper. Gently stir the rice and transfer to the prepared dish. Press down lightly to evenly distribute and compress the rice. Sprinkle the peanut halves and coconut on top and gently press down so that they stick to the top.
3. Let stand for 30 minutes or so and then cut into squares to serve. Do not refrigerate. Store any leftovers on an airtight container at room temperature.

Makes 1 x 9 in by 9 in rice cake, approximately 20-25 slices.


This month I'm featuring vegan recipes from Myanmar (Burma).
Check out my other Burmese recipe posts:

Friday, 26 December 2014

Gin Thoke (Burmese Ginger Salad)


I came onto the blog today thinking to share another great Burmese recipe with you for Myanmar month, I was halfway through posting up my Burmese Sticky Rice cake when I realised that so soon after Christmas most people are probably well and truly dessert-ed out! So instead I'll share with you this rather special, very healthy and very fresh salad.

It's a ginger salad, yes, ginger. You might think that is a bit too strong to be a main ingredient in a salad, but this salad uses beautiful fresh ginger which you pickle yourself the night before making the salad. The pickling softens the ginger and smooths the punchy flavour and the end result is really so delicious. I served it up at my Burmese Dinner party and everyone absolutely loved it. It makes a perfect addition to a big meal because the fresh crunchy salad and zingy ginger are so refreshing and make a light and tasty accompaniment to heavier dishes.


Ingredients
1/2 cup grated fresh ginger
1/4 cup lime juice (or a mixture of lemon and lime)
1 tbsp. sesame seeds
3 cloves garlic, thinly sliced
2 tbsp. peanut oil
1 small quarter green cabbage , finely shredded
2 small tomatoes, chopped
1/2 green chilli, finely chopped
1/4 cup peanuts, finely chopped
2 tbsp. light soy sauce
1 tbsp. chickpea (besan) flour

To Make
1. Combine the grated ginger and lime juice in a jar and shake well. Let sit in the fried overnight, or for about 12 hours. If possible, take it out and shake it a couple of times during the 12 hours.
2. Dry roast the sesame seeds in a pan over a low-medium heat until slightly browned. Remove and set aside to cool. Heat the peanut oil in the pan and fry the garlic slices until they start to brown and go a bit crispy. Remove from the pan with a slotted spoon to cool. Keep any remaining oil from the pan in a jar or small bowl.
3. Squeeze the lime juice from the ginger and add any juice squeezed out to the jar with the cooled garlic oil. Combine the shredded cabbage, tomatoes, ginger, chilli, peanuts and chickpea flour in a large bowl and toss to combine.
4. Add the soy sauce to the jar with the garlic oil and lime juice and shake to combine. Pour over the salad and toss through. Top the salad with the fried garlic chips and serve.

Serves 4-6 as a side salad.


This month I'm featuring vegan recipes from Myanmar (Burma).
Check out my other Burmese recipe posts:


Friday, 19 December 2014

Tomato Vodka Pasta Sauce Gift Packages


Edible gifts are always my favourite things to give at Xmas time, but over the last couple of year I've realised just how unhealthy all the traditional ones are! Mostly its chocolates, lollies, biscuits, jams and desserts in jars. So much sugar! I know a lot of people in my family and friends are trying to have less sugar in their lives which is a wonderful thing and the last thing I want to do is discourage them by piling them with sugary treats at Xmas. No matter how well intentioned, I know I'm not really doing them a favour.

Last year I shared with you gorgeous jars of bean soup mix, which has turned into one of my favourite healthy (and so easy!) gifts. I also shared 2 types of Cornbread in a Jar - Chilli Cornbread and  Za'atar Cornbread. I've started to realise since then just how many wonderful home made edible gift ideas there are which aren't piles of sugar.

This one is my new favourite, mostly because I'm a pasta fanatic. It's very adaptable - you can use any pasta sauce you like. If you've got a fabulous signature sauce use that, if not give this recipe a go. Then, go and buy the fanciest pasta you can find in the most fun and exotic shape you can. Sure, it'll cost you $6 instead of 99 cents, but that still works out as a pretty cheap present! It really won't be the same if you use cheap penne, as the exotic pasta in spectacular shapes will be a real treat.


Tomato Vodka Pasta Sauce
 
Ingredients
1 tbsp. olive oil
2 onions, diced
3 cloves garlic, minced
1-2 kg ripe tomatoes, chopped roughly
1 carrot, diced
1 celery stick, chopped
1 cup vegetable stock
1 bay leaf
1 cup loose basil leaves, torn up
1 cup vodka
1/2 cup blanched almonds
Salt and pepper to taste
 
To Make
1. Heat the olive oil in a large pan and sauté the onions until soft. Add the garlic, tomatoes, carrot, celery, vegetable stock and bay leaf and simmer gently for 15-20 minutes or until vegetables are completely cooked through.
2. Remove from the heat and take out the bay leaf. Stir through the basil leaves, vodka and blanched almonds. Season with salt and pepper, if you like. Allow the sauce to cool a bit and then put in a blender and purée until completely smooth.
3. Transfer to washed large jars and put the lids on tightly.
 
Now - if you're giving these away straight away, you can give them just like this & tell your recipient to store in the fridge and use within  a few days. If you're not sure when they'll use it, or if you'd like to make them up in advance, then just quickly sterilise and seal the jars after you make them. Then they'll keep in the cupboard for months. To do this, line the bottom of a really big saucepan with a tea towel (so that the bottoms of the glass jars aren't touching the bottom of the hot pan) and place your jars in (make sure lids are on as tight as you can). Fill with enough cold water to completely cover the jars and turn on the heat. Bring to a boil and boil for about 20 minutes. Then turn off the heat and allow to cool.
 
Makes approximately 2 large jars.


To make up your gift packs, simply cut a piece of hessian or something suitably rustic and pie it on the top of your jar using black or brown twine. Label your jars and use twine to tie the jar to a packet of gourmet special pasta. You may also like to include a used by date on your label.


Wednesday, 17 December 2014

Burmese Tomato Salad


Growing up I was always a complete tomato fanatic, and I still find it pretty hard to go past a recipe for tomato salad! This Burmese one is one of the best I've ever made, definitely. It's flavoured by the quintessentially Burmese ingredients of sesame seeds, peanuts, chickpea flour and (vegan) fish sauce. One of my favourite things about tomatoes in salads is that they really soak up the dressing and take on all the wonderful flavours.

This makes a colourful and fresh addition to a family feast, potluck or gathering. The Burmese make it with fish sauce, but I've substituted my home made vegan fish sauce instead - you can, of course, use either.

Burmese Tomato Salad

Ingredients
1 tbsp. sesame seeds
1 tbsp. chickpea (besan) flour
4 tomatoes, roughly diced
1 small onion, finely diced
2 cloves garlic, finely minced
1 green chilli, finely minced (remove the 'placenta' of the chilli if you want it mild)
2 tbsp. finely chopped coriander
2 tbsp. finely chopped peanuts
1 tbsp. lime juice
1 tbsp. vegan fish sauce

To Make
1. In a small frypan, dry toast the sesame seeds until just golden. Set aside cool. Then dry toast the chickpea flour unto just starting to go golden, tossing frequently to ensure even toasting. Set aside to cool. At this stage you can also toast the peanuts, if you are using peanuts that are not already roasted.
2. Combine all ingredients in a bowl and gently mix with your fingers. Serve.

Serves 4 as a side salad.


This month I'm featuring vegan recipes from Myanmar (Burma).
Check out my other Burmese recipe posts:

Saturday, 13 December 2014

Oranjebitter - Dutch Orange Bitters (Vegan Virtual Potluck 5)


Remember when we had Netherlands month on the blog? Of course you don't, it was ages ago! This recipe for Oranjebitter (Orange Bitters) is from way back then but I was holding onto it for a special occasion. The return of the spectacular Virtual Vegan Potluck is the perfect time to share this one with you, not only because I'm in the beverages category - but also because the (optional) theme ingredient this time around is Citrus.

Cue: Orange Bitters. You might be wondering what orange bitters is, and thinking that the use of the word "bitter" in the title is not so appealing. Ever had a Lemon, Lime & Bitters? They use Angostura bitters. Dutch Orange Bitters (Oranjebitter) is another type of bitters, but an orange flavoured one - pretty self explanatory.

Their uses are very broad, they make a great aperitif, digestif and cocktail ingredient. One of the easiest ways to use your orange bitters is to make yourself a Lemon, Lime & Orange Bitters. Just swap out your angostura bitters for orange. There are many cocktails which specifically used orange bitters, but you can also use it to drizzle over ice cream, to flavour cakes and desserts or just to drink on ice if you love the taste of bitter orange (if you're a marmalade lover, then you probably do love the taste of bitter orange!). If you're keen to just drink it as a dessert, you can whip up a simple sugar syrup (gently heat 1 cup water with 1 cup sugar to dissolve and then cool to room temperature) and then add the orange bitters to taste.

Because it's been such a long time since Netherlands month, I'll remind you of some of the delicious vegan recipes I shared:


Dutch Orange Bitters (Oranjebitter)

Ingredients
1 lemon, washed
1 orange, washed
5 cardamom pods
3 tbsp sugar
2 star anise
1 cinnamon stick
1/3 vanilla bean
2 cups vodka

To Make
1. Use a potato peeler to thinly peel the orange and lemon. Juice them both and then set the juice aside, but save the seeds. Lay the peel and the seeds out on a tray and dry them in a warmed oven until dried out and crisp.
2. Place the peel, seeds, cardamom pods and sugar in a mortar and pestle and crush up just a little bit.
3. Combine all ingredients in a medium sized jar and pour the reserved orange and lemon juice and the vodka over the top. Shake well and put the lid on nice and tight.
4. Leave in a cool, dark place for 2-3 weeks to infuse, taking it out and shaking it up every couple of days.
5. You can leave it as long as you like, and taste it every so often until you get it as strong and bitter as you like. When you like how it tastes, strain through a tea strainer lined with filter paper to get a clear golden liquid. Stores in the cupboard for 12-18 months. 

Makes 2 1/2 - 3 cups. 

A quick note- I've photographed mine before I strained it out, to show the ingredients infusing in the jar, which is why it's still quite cloudy in my pictures. The final result after straining will be clearer.

Cocktails using Orange Bitters:


This is part of the Virtual Vegan Potluck #5, so please use the buttons below to check out what other delicious recipes have been brought to the potluck:

Go BackGo Forward


Or, if you'd like to start at the beginning and work your way through, click here.

Stay Calm Beginning Green

Thanks for stopping in and enjoy the potluck! If you like what you see on the blog and want to keep in touch, I recommend liking the Gormandize facebook page so that you can get my new recipes all up in your feed!

In case you're interested.... this month is Myanmar (Burmese) Food Month on the blog.


This month I'm featuring vegan recipes from Myanmar (Burma).
Check out my other Burmese recipe posts:

Tuesday, 9 December 2014

Vegan Ohn No Khao Swe (Burmese Noodles) with Chickpea Tofu


The first dish I'm sharing for Burmese food month is Ohn No Khao Swe, one of the countries most common and popular dishes. It's traditionally made with chicken, but I've substitited another Burmese food staple, chickpea tofu. I made my own chickpea tofu according to this recipe from a blog called Girl Eats World. I followed the recipe to the letter when I made it, so rather than reproduce her hard work I've linked to her original recipe. It was delicious and surprisingly easy to make! If you don't feel like doing it, you can substitute some bought tofu, although it won't have the beautiful flavour of the chickpea tofu.

The soup that these noodles and tofu are immersed in - oh my goodness - I don't think I have adequate words to express it! It's the tastiest curry soup I've ever made, no exaggeration! Really something special! It utilises my lovely home made fish sauce, as does many of the Burmese recipes I'll be sharing over December.

Vegan Ohn No Khao Swe with Chickpea Tofu

Ingredients
2 tbsp peanut oil
1/2 inch fresh ginger, peeled
4 cloves garlic, peeled
2 shallots, sliced
2 onions, 1 sliced and 1 diced
2 tbsp chickpea (besan) flour
3 cups "chicken" stock (use a veggie based chicken stock or substitute with vegetable stock)
1 cup coconut milk
1/2 tsp turmeric
1 tsp chilli flakes
1 tsp paprika (optional)
2 tbsp vegan fish sauce (plus more to taste, if you like)
1/2 batch chickpea tofu
300-400g Thin rice or wheat noodles 
Lime, cut into wedges to serve
Fried shallots, to garnish (optional)
Fresh coriander, to garnish (optional)

To Make
1. Heat oil in a large frypan or wok and cook the sliced onion until golden. Combine cooked onion, fresh ginger, garlic and shallots and make a paste (i.e. in a food processor or a mortar and pestle, add 1/3 of a cup of water if using a blender or food processor).
2. Cook the diced onion in the remaining oil in the pan for 2-3 minutes and then add your paste and cook for a further 1-2 minutes. Mix chickpea flour with 1/4 cup cold water and add to the pan along with the 'chicken' stock, coconut milk, turmeric, chilli flakes and paprika. Bring to a simmer and then add the vegan fish sauce.
3. Cook your noodles according to the instructions on the packet. Once cooked, distribute evenly amongst four bowls (or, serve in one large bowl like in the picture above) and top with cubes of chickpea tofu. Ladle the hot soup/sauce over the noodles and tofu and garnish with lime wedges, fried shallots or coriander. Drizzle additional fish sauce over the dish to taste.

Serves 4.


This month I'm featuring vegan recipes from Myanmar (Burma).
Check out my other Burmese recipe posts:

Monday, 8 December 2014

Vegan Fish Sauce


After a couple of months of minimal blogging and no featured countries, I'm getting back into the swing of it. This month's featured country is Myanmar, which I was really excited about. You should be too, it's completely delicious and I have some great thing to share with you this month!

Fish sauce is pretty ubiquitous in Burmese cuisine, so it was an obvious starting point for this country. I'm not big on buying substitutes, they tend to be full of letters and numbers and sometimes don't even taste like the product they're trying to replace. So I figured I would make my own. 

Fish sauce has a couple of distinct elements - 1) salty, sour flavour and 2) rancid smell. I think this version does pretty well on both! I kept a bottle of the real stuff next to me on the bench while I was concocting it and I think actually they tasted pretty much the same. This vegan version won't be as clear as the real stuff, it goes a bit cloudy because of the miso, so remember to shake it up before you use it.

A lot of recipes for vegan fish sauce add sugar, however, when I was tasting the actual fish sauce I didn't get sweetness from it so I think it's not necessary at all & lets face it - less sugar in our lives can only be a good thing.


Vegan Fish Sauce

Ingredients
1 tsp red miso
1 tsp black miso
1/4 cup water
1/3 cup light soy sauce
1 tbsp pineapple juice

To Make:
1. Place the two types of miso in a small bowl or jar and add a little bit of the water. Stir vigorously to make a smooth runny paste with no lumps. 
2. Gradually add in the rest of the ingredients, stirring as you go to keep the consistency smooth.
3. That's it. Bottle it up and store in the fridge.

Use in any recipe which calls for fish sauce or just add to any Asian style dish.

Makes about 1 cup vegan fish sauce.

This month I'm featuring vegan recipes from Myanmar (Burma).
Check out my other Burmese recipe posts:

Wednesday, 3 December 2014

Chilli Vodka (Easy Home Made Christmas Presents!)


People who love chilli are great to have in your life when it comes to gift giving season - they're so easy to make presents for! I'm big on home made gifts, it's a win win in most cases. Making infused alcohols has to be one of the easiest home made gifts to make, and I've done a few over the years! They're quite possibly also the most fun to receive :)


Strawberry & Lime Infused Vodka, Raspberry Vodka & Pineapple & Basil Vodka have featured on the blog in past years as edible gifts (or just great things to make for yourself!).

I'm adding to that list now with Chilli Vodka! Simple, yes. Done before, certainly. But the chilli loving vodka drinker in your life will think of no better gift you could possible have given them, it is always a hit! It looks beautiful and keeps on giving, as you can instruct the recipient to just keep topping the bottle up with vodka as they use it to keep the supply coming. Eventually the chilli will turn completely white and it might be time for a new one, but that will take quite a while.

Chilli Infused Vodka Gift Bottles

This is not really a recipe, as you can probably work it out for yourselves!

1. Get a nice bottle to put your gift in.
2. Take 2 long red chillis (you can use small red chillis or green ones, but long red ones look elegant in the bottle) and wash well. Make a slit in each one without cutting the chilli completely in half, just to allow the vodka to soak all through the chilli.
3. Place the 2 chillis in your gift jar and fill to the top with vodka. 
4. Seal well, decorate with festive ribbons or labels as you choose and attach a card. Done.

This is best done 2-3 days in advance, to allow the chilli to infuse the vodka, but not so early that the chilli starts to lose any colour.

Have fun with combinations, try:
~ Chilli & Lime Infused Vodka
~ Chilli & Lemongrass Infused Vodka
~ Chilli & Watermelon Infused Rum or Vodka

Any other cool ideas? :)


Sunday, 16 November 2014

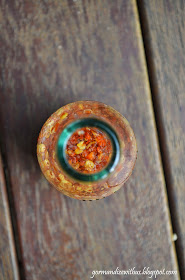
Shata (Sudanese Chilli Sauce)


To really get your metabolism going and your tastebuds on fire, here is a fantastic chilli sauce which comes from Sudan. It's simple - but it packs a big punch of flavour and will turn any bland meal into something spectacular :) It keeps well in the fridge in a sealed container for up to two weeks and it an accompaniment to anything you can think of!

Shata (Sudanese Chilli Sauce)

Ingredients
1 cup fresh lemon juice
3 cloves garlic, crushed
2 tbsp dried chilli flakes
1/2 tsp cracked black pepper
1/2 tsp salt

To Make
1. Mix all ingredients together well.
2. Let stand for at least 10 minutes and the serve with anything. 


Thursday, 6 November 2014

Big Fat Veggie Burger Bowl


I've decided to make November a healthy month on the blog, so I'm going to give you lots of colourful fresh healthy foods low in fat, low in carbs and low in sugar! I've been craving fresh healthy foods this month, because I did a fair bit of (wonderful) indulging last month.

I love a good veggie burger, but often I don't feel like eating the bread so it's become less common on our weekly dinners. This week I wanted a burger so I thought I'd make it into a big fat salad bowl instead. It was just as filling but minus all the bread, and I felt really great after I'd finished it (as opposed to over full and slightly ill which is how I often feel after a big fat veggie burger).

You can make this salad using any patties you like. I used chickpea and cumin patties which I bought from the supermarket, which made this a super quick and easy dinner. You can use any bought veggie or bean or lentil burgers, or you can make your own burger patties from the millions of great recipes out there on the internet :) You can also adjust the other salad ingredients to be what you like to have on your burger, I've chucked in some marinated artichoke hearts here which are not traditionally on a burger, but which I happened to have lots of in my fridge. Add or subtract what you like! If you like your burgers Aussie-Style then you might want to whack some tinned beetroot in with it (yum!).


Big Fat Veggie Burger Bowl

Ingredients
2-3 handfuls of torn iceberg lettuce (you can sub fancier stuff if you like, but for burgers I like the crunch of iceberg)
1 carrot, grated
1 large tomato, diced
2-3 marinated artichoke hearts, chopped (optional)
1 large dill pickle, thinly sliced
1 ripe avocado, sliced
2 veggie patties of your choice
Burger sauce of your choice (I used BBQ, you can use tomato, sweet chilli, mayo or anything you like)
2/3 cup hummus
Sumac or smoky paprika for sprinkling on the hummus


To Make
1. Distribute the lettuce, grated carrot, tomato, artichoke hearts, pickle slices and avocado evenly between two bowls.
2. Cook the burger patties according to the instructions on the packet - you can usually pan fry in a little oil (I like this method, as is makes the edges nice and crispy) or heat in the oven for a slightly healthier, oil-free option. Once cooked chop roughly into pieces and add to the bowl.
3. Drizzle the chopped veggie patties with your choice of burger sauce and then dollop about 1/3 cup hummus on top of each bowl (you can be more generous - of course!).
4. Sprinkle some sumac or smoky paprika on top of the hummus and you're ready to go!

Serves two.
Part of the VVLP.


Thursday, 30 October 2014

Blueberry & Avocado Salad with Candied Walnuts


Living in Australia, trips to Europe are a big deal. It's the other side of the world - the flights are long, exhausting and expensive! But I was adamant to make it over there last year to visit a dear friend. I was thrilled to escape the Sydney winter and spend my time strolling around beautiful cobblestone streets in a European summer. I've already posted a few post from my travels, you can check them out here:

Sweets in Sweden - A Photographic Diary
Wild Blueberries on the Stockholm Archipelagoes
A Day in Riga - Buildings, Berries & Black Balsam

You might notice a recurring theme - loads of fresh berries! We were so spoilt for fresh berries throughout our trip. Check out these gorgeous berries piled high in stalls on the side of the streets in Riga (Latvia):


In Australia punnets of blueberries or raspberries are always an expensive treat - even when they're in season. So it's no wonder that I ate them to my hearts content and came home with a mind full of berry inspiration! Now, Northern Europe is heading into winter and sunny Sydney is almost in summer, which means blueberries here are about as cheap as they'll ever get. So I took my inspiration from these gorgeous pictures and the memories of all those yummy berries & picked up a couple of punnets of blueberries to experiment with. 

Blueberry & Avocado Salad with Candied Walnuts

Ingredients
4 tbsp brown sugar
4 tbsp water
1/2 cup walnut halves
2 cups baby spinach
1 large ripe avocado
1 punnet blueberries
1 tsp extra virgin olive oil
1 tsp soy sauce
2 tsp fresh lemon juice
2 tsp balsamic vinegar
Cracked black pepper

To Make
1. To make the candied walnuts - combine the brown sugar and water in a small saucepan and heat over a medium heat until the sugar is dissolved to form a simmering syrup. Add the walnut halves and stir continusouly while the syrup simmers. Cook for at least 5 minutes, or until the liquid has all cooked away and you are left with the coated walnuts. Transfer the walnuts to a sheet of non stick baking paper, breaking up any clumps, and place in the fridge to harden.
2. Line a salad bowl with the baby spinach leaves. Top with cubes of the avocado and then the fresh blueberries.
3. Combine the olive oil, soy sauce, lemon juice and vinegar and whisk well until combined. Drizzle over the avocado & blueberries.
4. Top with candied walnuts and a generous amount of cracked black pepper.

Serves 2-4 as a side salad or as part of a buffet.


Also featured in the Vegan Virtual Linky Potluck.

Friday, 5 September 2014

Soetkoekies (Vegan)


I always find making cut out biscuits therapeutic, rolling out the dough and cutting out each one and then carefully transferring them to the tray and cutting out the next batch while the first batch are baking. I don't bake biscuits very often (because then I would eat biscuits very often), but I love putting some music on and spending an afternoon baking. I also love port. True, I love it. That makes this recipe just perfect. Have a little glass of port while you roll and bake & enjoy your afternoon! It's cold and rainy today and I wish I was at home drinking port and baking instead of here at work!

Soetkoekies

Ingredients
250g flour (I use wholemeal)
1 tsp cinnamon
1 tsp ground ginger
1/2 tsp ground cloves
100g castor sugar
1/2 tsp baking powder
60g ground almonds
125g vegan margarine or butter
1/3 cup apple sauce
30ml port
Slivered almonds, to decorate

To Make
1. Combine all the dry ingredients in a bowl and then rub the butter in with your fingers until it resembles coarse breadcrumbs. Add the apple sauce and port and mix into a stiff dough. If it's too sticky (sticking to your fingers while you mix) add a bit more flour until it's not sticky anymore. If it is too dry and crumbly (won't come together in a smooth ball) then add a little more port.
2. Refrigerate dough for at least 2 hours, or overnight.
3. Heat oven to 180 degrees C.
4. Cut the dough into quarters and roll out a quarter at a time to about 5mm thick, then cut into whatever shapes you like. Place each biscuit on a tray lined with baking paper. Decorate each with a few slivered almonds.
5. Bake for 8-10 minutes (or until just starting to turn golden brown), turn the tray about halfway through to ensure even baking.
6. Transfer to a cooling rack to cool complete and then store in an airtight jar or container.

Makes about 2 dozen (depends on the size of your biscuit cutters).


This month I'm featuring recipes from South Africa.
Check out my other South African recipe posts:

Wednesday, 20 August 2014

Chakalaka (South African)


It's been quiet on the blog because lately a lot of life has been happening instead, I've got so many wonderful things on and some great things that I'm working towards at the moment. But I do have a file full of photos and recipes to share with you, and I'll do my best to get as many of them up as I can.

I'm going to be taking the next couple of months off my world food challenge, because I've got a bit too much else happening. But I have quite a few recipes left over from South Africa month (last month) which I didn't get a chance to share, so I'll post them and you'll still get your fix of world food on Gormandize.

Today I'll give you a fun but simple dish. The fun is really in saying the name - chakalaka! But also the dish is delicious. It would traditionally be packed full of capsicum, but as capsicum makes me sick I hope I'll be excused for making mine without. I've added a grated zucchini in their place, which was really delicious. If you'd like to try it with, add one green and one red at the same time you add the chillis.

South African Chakalaka

Ingredients
2 large onions, chopped
2 tbsp. olive oil
2 Serrano chillis
4 cloves garlic, crushed
3 carrots, grated
1 large zucchini, grated
2 tsp curry powder
5 tomatoes, chopped
1 tbsp. tomato paste
1 can baked beans
1 tsp. paprika
Salt and pepper to taste

To Make
1. Heat the oil in a large saucepan and add the onions. Cook until just starting to brown and then add the chillis, garlic and curry powder and continue to cook for a further 2 minutes or so.
2. Add the carrot and zucchini and cook for a further 2 minutes, stirring frequently.
3. Add the tomatoes and reduce the heat. Leave to simmer for about 10 minutes (if you tomatoes weren't very juicy, you may need to add a little water to stop it sticking).
4. Once the tomatoes are cooked down and the vegetables are cooked, add the tomato paste, baked beans, paprika and salt and pepper to taste and let simmer for a further 5 minutes. The end result should be thick and saucy, if it is watery, cook down for longer until it reduces.

Serve hot on toast, with rice or as a side dish. Or serve cold as a relish on burgers, wraps or anything you like.

I've entered this dish in the Vegan Virtual Linky Potluck.


This month I'm featuring recipes from South Africa.
Check out my other South African recipe posts:


Thursday, 24 July 2014

South African Tomato Chutney


Making up sauces, pickles and chutneys is one of my favourite things to do when I'm exploring the cuisines of other countries. They're so satisfying and you end up with a nice big jar in the fridge to put on whatever you like. This South African  Tomato Chutney isn't my recipe, it comes out of my favourite cooking magazine, SBS Feast which did a lovely feature on South African Cuisine in it's January 2012 issue, which is still sitting around on my shelf. It was nice to get it out and thumb through it again looking for inspiration for my featured country this month.

It's more of a tomato sauce than a chutney really, beautifully simple and packed with flavour. It's very versatile, we spooned it all over our South Africa dishes and then used up the leftovers dolloped on salads and vegetarian sausages (it was GREAT with the sausages!).

South African Tomato Chutney
Adapted from Feast Magazine, January 2012

Ingredients
1/4 cup olive oil
1 large onion, finely chopped
4 garlic cloves, crushed
4-5 medium tomatoes, finely chopped
1 1/2 tbsp. tomato paste
1 tsp. sugar
1/2 tsp. salt
1/3 cup (loosed packed) chopped fresh coriander

1. Heat oil in a pan and add the onions and garlic. Cook for 2 minutes, or until softened, and then add the tomatoes and cook for a further 2-3 minutes.
2. Add the tomato paste, sugar and salt and simmer for 5 minutes. Once sauce has thickened, stir in the coriander and remove from the heat. Eat straight away dolloped on anything or put it in a jar and keep in the fridge for up to 5 days.

Makes 1 large jar.


This month I'm featuring recipes from South Africa.
Check out my other South African recipe posts: