Showing posts with label biscuits. Show all posts

Monday, 29 June 2015

Chocolate Oat Hazelnut Chewy Biscuits (Vegan)


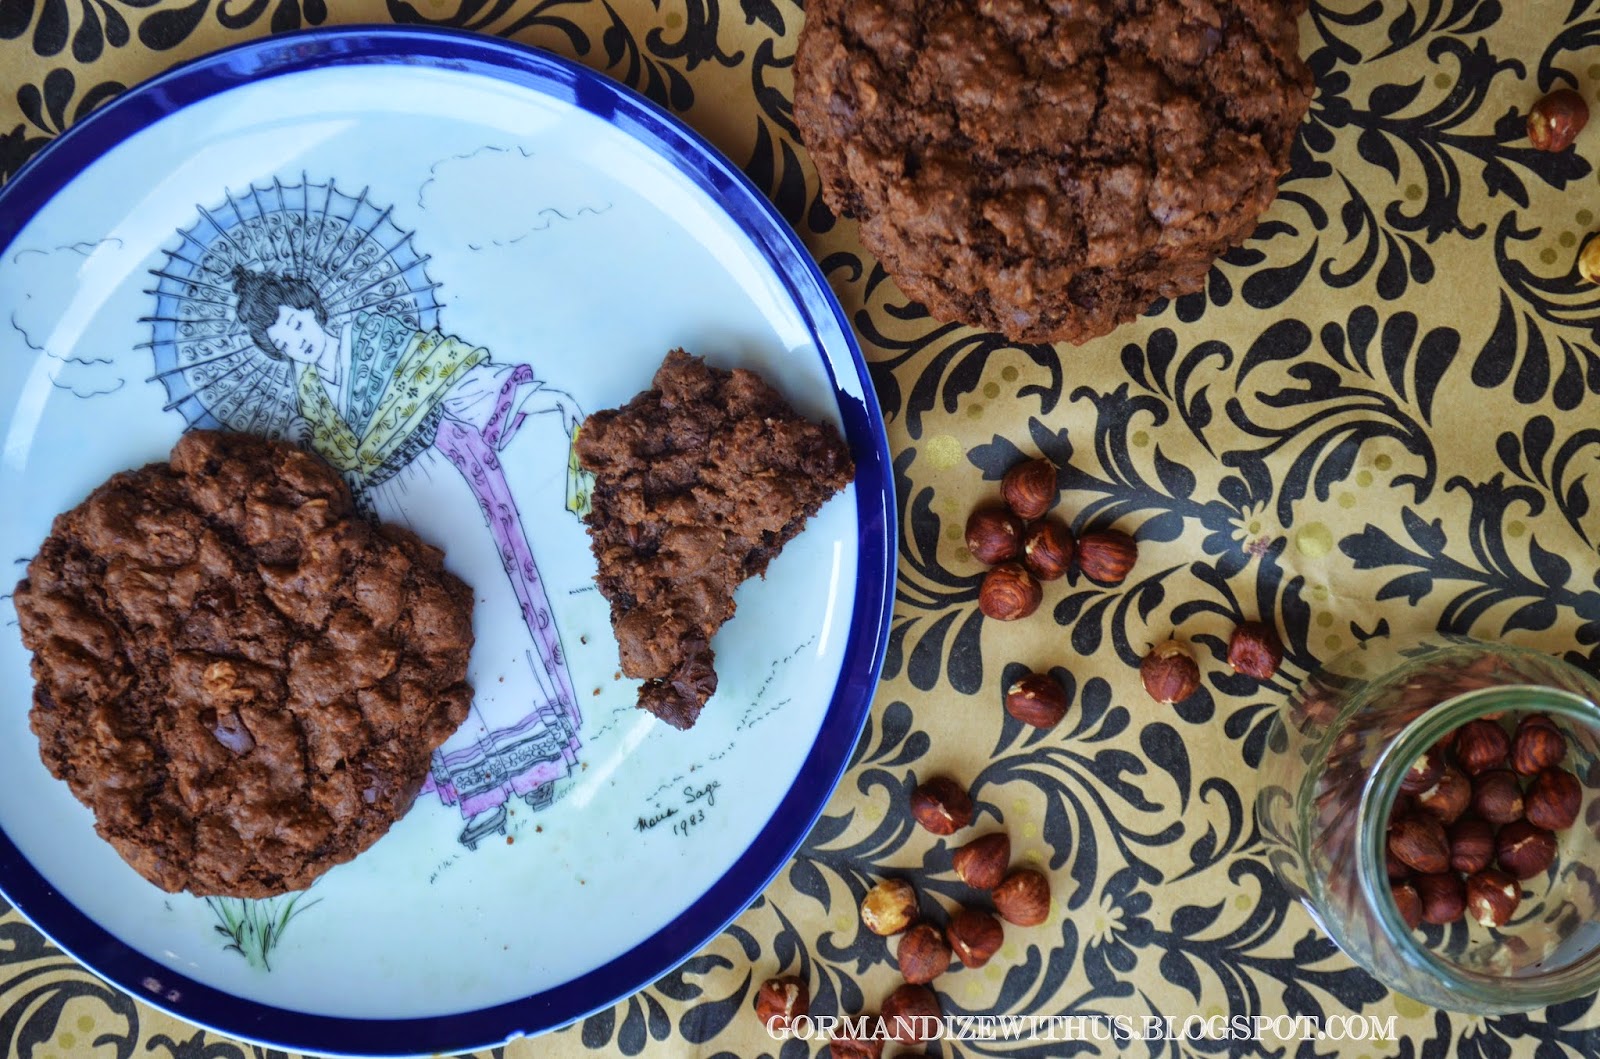
Oh, chocolate biscuits - how heavenly you are. I try my best not to cook biscuits, because there are only two of us here and of course that means we would eat them all. Very easily.

But sometimes you just need a big giant home made chocolate biscuit, the kind with everything in it and which is chewy and fudgy and rich and spectacular. These are those biscuits, they were incredible.


Chocolate Oat Hazelnut Chewy Biscuits

Ingredients
2 tbsp ground flaxseeds (linseeds)
2/3 cup oat milk (you can sub soy or almond or hazelnut milk)
2/3 cup apple sauce
1 tbsp canola oil
1 tsp vanilla extract
1 2/3 cups wholemeal flour
2/3 cup cocoa powder
2 cups rolled oats
1/2 tsp baking powder
1/2 tsp bicarb soda
1 1/4 cups sugar
2/3 cup roughly chopped hazelnuts
3/4 cup roughly chopped dark chocolate chunks

To Make:
1. Preheat the oven to 180 degrees C.
2. Whisk together the ground flaxsees and oat milk and then add the oil and the vanilla extract.
3. Add in all the dry ingredients, leaving the hazelnut and chocolate chunks til last and then folding them through.
4. Line a baking tray with non-stick baking paper. Drop about 3 generous tablespoons of batter onto the paper for each biscuit, leaving plenty of space between them (at least 2 inches) for them to expand as they cook. I could only fit six onto my rectangular tray. 
5. Bake for 12 minutes (they should have spread out and be cooked on the outside, but still a bit soft in the middle when you gently press on them), then remove from the oven and let them cool on the tray for 5 minutes before transferring to a cooling rack. 
6. Continue until you have used up all the batter.

This makes about 8-10 really big biscuits, but you can make them smaller if you like, just reduce the cooking time by a couple of minutes. 


Tuesday, 21 April 2015

Orange Teacake Biscuits


It's only since I started blogging that I realised how much I love orange. It had never really occurred to me before, but since I label each post according to key ingredients and the list appears in the side bar to your right, I've discovered that 'orange' is one of my most frequently used labels. In fact, I've got almost as many recipes labelled 'orange' and I do 'chocolate'! I glanced down the list, they're a fairly equal spread of sweet and savoury. When people ask me about my favourite ingredients I never think of orange, but it turns out I use it a lot more often than many of the ones I would list as favourites.

Part of the reason is because I'm a bit addicted to home made orange curd, and use it on a lot of things :) But actually I think the main reason is the use of oranges across the whole world to add flavour to such a broad variety of dishes. Many of my orange recipes on this blog are actually part of my world food challenge posts, recipes from all different parts of the globe which use orange as a central flavour to their cooking, it's amazing when you think about how far ingredients spread around the world to be adapted and interpreted by so many different cultures. Here are a few examples of the Orange posts from all over the globe, just to highlight my point:

The Netherlands - Dutch Orange Bitters (Oranjebitter)
Tunisia - Orange Flavoured Doughnuts (Yoyo)
Brazil - Fried Rice Balls flavoured with Orange, Olive & Brazil Nuts (Bolinhos de Arroz)
Nepal - Chilli, Grapefruit and Orange Salad
Egypt - Orange & Olive Salad with Cumin
Samoa - Chocolate Orange Rice Pudding (Koko Rice)
Costa Rica - Orange & Passionfruit Pudding

We could actually add Russia to that list now, because I found and adapted these lovely Orange Teacake Biscuits when researching Russian recipes for the blog.


Orange Teacake Biscuits

Ingredients
1 cup nuttelex (or other vegan friendly margarine or butter)
1 cup castor sugar
1 tbsp. orange zest
1 tbsp. orange juice
2 tsp orange extract
2/3 cup apple sauce (or you can use an egg replacement such as 'no egg"'to the equivalent of 2 eggs)
3 cups wholemeal flour
1 tsp baking powder
Large granule sugar (sometimes called 'coffee sugar'), for decorating

To Make:
1. Cream the butter and sugar together using an electric mixer (or some nice vigorous elbow grease, which is my most common method). Add the orange zest, juice, extract and the apple sauce and mix until completely smooth.
2. Sift in the flour and the baking power and mix well. Form your dough into a ball and wrap in cling wrap, refrigerate for 30 minutes.
3. In the meantime preheat your oven to 180 degrees C. Cut your dough into 3 pieces and roll out the first one on a floured bench to about 1/4 inch thick. Cut out whatever shapes you like and arrange on a tray lined with non-stick baking paper. Press a sprinkling of the large sugar granules into the top.
4. Bake in batches for about 8 minutes, or until just lightly golden in colour. Turn the tray around about 5 minutes into the cooking to ensure even baking. If you're using smaller than average cutters, they will need a bit less cooking time.

Makes 25-35 biscuits, depending on the size of your cutters.


Friday, 5 September 2014

Soetkoekies (Vegan)


I always find making cut out biscuits therapeutic, rolling out the dough and cutting out each one and then carefully transferring them to the tray and cutting out the next batch while the first batch are baking. I don't bake biscuits very often (because then I would eat biscuits very often), but I love putting some music on and spending an afternoon baking. I also love port. True, I love it. That makes this recipe just perfect. Have a little glass of port while you roll and bake & enjoy your afternoon! It's cold and rainy today and I wish I was at home drinking port and baking instead of here at work!

Soetkoekies

Ingredients
250g flour (I use wholemeal)
1 tsp cinnamon
1 tsp ground ginger
1/2 tsp ground cloves
100g castor sugar
1/2 tsp baking powder
60g ground almonds
125g vegan margarine or butter
1/3 cup apple sauce
30ml port
Slivered almonds, to decorate

To Make
1. Combine all the dry ingredients in a bowl and then rub the butter in with your fingers until it resembles coarse breadcrumbs. Add the apple sauce and port and mix into a stiff dough. If it's too sticky (sticking to your fingers while you mix) add a bit more flour until it's not sticky anymore. If it is too dry and crumbly (won't come together in a smooth ball) then add a little more port.
2. Refrigerate dough for at least 2 hours, or overnight.
3. Heat oven to 180 degrees C.
4. Cut the dough into quarters and roll out a quarter at a time to about 5mm thick, then cut into whatever shapes you like. Place each biscuit on a tray lined with baking paper. Decorate each with a few slivered almonds.
5. Bake for 8-10 minutes (or until just starting to turn golden brown), turn the tray about halfway through to ensure even baking.
6. Transfer to a cooling rack to cool complete and then store in an airtight jar or container.

Makes about 2 dozen (depends on the size of your biscuit cutters).


This month I'm featuring recipes from South Africa.
Check out my other South African recipe posts:

Tuesday, 20 August 2013

Chocolate Cranberry Cashew "Cookie Dough" Balls


A quick little recipe for you for this month's Sweet Adventures Blog Hop. The theme this month is "Cookie Monster", but I'm on a bit of a health kick at the moment and I'm currently feeling really good about myself. So the last thing I want to eat is biscuits. I tried my hand at a healthy alternative though - healthy vegan cookie dough bites. Raw, vegan, no flour but with a bit of sugar (nobody's perfect). They make a lovely healthy sweet snack.


Use the links below my recipe to check out the other biscuit-y entries in this month's hop!


Chocolate Cranberry Cashew Cookie Dough Bites

Ingredients
2/3 cup raw cashew pieces
1 tbsp dried coconut
2 heaped tbsp rolled oats
2 tsbp cocoa powder
3 tbsp maple syrup
1 tsp vanilla extract
1 tbsp dried cranberry pieces (if you have whole dried cranberries, chop them up a bit) 
2 tbsp chopped dark chocolate pieces (about 20g)

To Make
1. Place the cashews, coconut and oats in a food processor and process until they form a flour consistency.
2. Add the cocoa, maply syrup and vanilla extract and pulse until the mixture all comes together.
3. Transfer to a bowl and stir through the cranberry and chocolate pieces.
4. Roll out into balls using your hands and chill for at least 10 minutes before eating.

Makes 10 balls.


Wednesday, 29 May 2013

Vegan Alfajores (Argentinian Dulce de Leche Sandwich Biscuits)


Have you been enjoying all the dulce de leche-y goodness? Guess that is a silly question. Who wouldn't love treats laced with rich creamy vegan home made dulce de leche? You don't have to answer that.

So - earlier this month I made some vegan dulce de leche and then used it in a Argentinian dulce de leche tiramisu (yum!! you should check that out). But that isn't it for the dulce de leche this month. Now, feast your eyes on these! Or, better still - make them and then feast your mouth on them too. They're light crumbly vegan shortbread sandwich biscuits filled with decadent dulce de leche. Need I say anymore? I hope you said "no" because I wasn't planning on writing any more on this post - just enjoy the recipe!


Vegan Argentinian Alfajores

Ingredients
1 cup plain flour (I like to use 1/2 wholemeal and 1/2 white, but you can use all white if you prefer)
1 1/2 cups cornstarch
1/2 tsp baking powder
1/2 tsp salt
1/2 cup soft icing mixture (confectioners sugar)
1 cup dairy free margarine (such as Nuttelex)
1 tsp vanilla extract
2 tbsp rum or Pisco (or to make a dairy free version, substitute cold black tea)
Vegan dulce de leche (home made or use store bought if you can find a vegan one)

To Make
1. If you haven't already, jump over to this recipe and make the dulce de leche so that it has time to cool while you make the biscuits.
2. Preheat the oven to 180 degrees.
3. Combine the flour, cornstarch, baking powder, salt and icing mixture in a bowl and mix well.
4. Cut the margarine into the mix and rub with your fingers until it resembles coarse breadcrumbs and there are no big lumps left.
5. Add the vanilla extract and rum and mix with your hands until it forms a smooth dough. If it's a little dry you can add a bit more rum, if it's too sticky add a little more flour. It should be wet enough to hold together in a ball, but not so wet enough that it sticks to your fingers as you form it. Wrap the dough in plastic and refrigerate for 40 minutes.
6. Generously flour a bench space and your rolling pin. Cut your dough in half and roll out half to a bit more than 1/2 cm thickness. Use a cookie cutter to cut out your biscuits in whatever shape you'd like (I used heart shapes and lip shapes). Transfer them to a tray lined with baking paper.
7. Bake the biscuits for 12 minutes, rotating the tray half way through to ensure even cooking. This may vary depending on how hot your oven really is - so keep a close eye on them. They shouldn't be browned on top, they should stay nice and white - not in a racist way of course... :)
8. Transfer to a cooling rack carefully until completely cold. Then spread the wrong side of the biscuit with a liberal amount of dulce de leche and gently place another biscuit on top. Continue until you use up all the biscuits.

Makes about 20 sandwich biscuits (this will vary depending on the size of your cutter).


This month I'm featuring lots of recipes from Argentina!
Check out my other Argentinian recipe posts:

Part of the VVLP.

Thursday, 25 April 2013

Speculaas - Dutch Spiced Biscuits


Dutch month is all about spices. What's that I hear you say? You love cinnamon, nutmeg, cloves, pepper, cardamom and ground ginger? Well, you have come to the right place because all those things are in abundance on the blog this month. When The Netherlands was requested by a reader to be my next featured country, I knew immediately I had to make some speculaas! Firstly because they're so special, secondly because they're so quintessentially Dutch and thirdly, because typically they're often already vegan - so easy peasy!

You'll notice, however, that my speculaas aren't the fabulous windmill shape of the ones you buy in the supermarket. I wish! You can buy wooden moulds designed specifically for making your speculaas into wonderful Dutch shapes - called a Speculaasplank. I looked at a couple on the internet, but sadly they don't come cheap so I had to give them a miss. Instead I cut mine into cute shapes and decorated them with almonds, not quite as cool as intricate windmills - but they tasted just as good!


Dutch Speculaas
Adapted from godutch.com

Ingredients
2 cups wholemeal flour
1/2 tsp baking powder
1/2 cup brown sugar
2 tsp ground cinnamon
1 tsp ground ginger
2/3 tsp nutmeg
1/4 tsp cloves
1/4 tsp cardamom
1/4 tsp ground pepper (optional, not included in many traditional recipes, but I love it!)
1 cup vegan margarine (nuttelex)
2 tbsp rice milk (or other non dairy milk), plus more if needed
Slivered almonds, to decorate

To Make
1. Combine the flour, sugar, baking powder and all the spices in a big bowl.
2. Cut the margarine into the flour mix and rub with your fingers until it forms a fine bread crumb like mix.
3. Add the milk and knead with your hands until it forms a dough. If it's too dry to form a ball, then add a little more milk. Form into a ball and then wrap in plastic wrap and leave in the fridge overnight for the spices to penetrate into the dough.
4. Preheat the oven to 180 degrees.
5. Sprinkle your benchspace with plenty of flour and dust your rolling pin. Cut your ball of dough in half and roll out one of the halves about 2/3 cm thick. Use shaped biscuit cutters and then place them on a baking tray lined with baking paper.
6. Decorate the tops of the biscuits with slivered almonds and bake for 15-18 minutes. Continue until you've used up all the dough. You'll probably need to bake 2-3 batches to get through them all.
7. Once baked, cool on a cooling rack.


I forgot to count how many biscuits it made! Bad blogger! :(
I think it made about 30. But that will depend on the size of your biscuit cutter.

As you can see, I made most of mine with a heart shaped cutter - but I also made a few of these cute cat shaped ones!


This month I'm featuring lots of delicious food from The Netherlands.
Check out my other Dutch recipe posts:

Thursday, 22 November 2012

Lontong Paris (Caramel & Peanut Coated Biscuits)


I tend to get overwhelmed by options. Whenever I have an array of options in front of me I just have so many things that I want to do that I find it hard to focus and choose one. Like choosing electives in high school (even though that was a long time ago now), I couldn't pick just two - I wanted to learn it all! I could have picked ten. I'm the same with choosing degrees, choosing careers, choosing classes. I just want to do so many different things, and learn as much as I possibly can!

I've been getting a lot of requests lately from readers to make a cookbook, which is something I have thought about doing for a little while. Since I am working only two days a week at my clinic at the moment, I decided recently to use that time to make it happen. Nothing huge, just a small, fun ebook. But, of course, being me, I have so many ideas on what kind of cookbook to write that I'm having difficulty focusing on one! So I need some help, please jump onto this facebook poll and vote for or suggest a theme. You can also like this page on facebook so you can get my recipes and news updates straight into your newsfeed. Your help is much appreciated!


But now to the finger-licking point - these little balls of heaven. Well, I say little, but I actually made mine rather big. They are called Longton Paris, an Indonesian sweet comprising of a soft melts-in-your-mouth biscuit coated in crisp caramel and rolled in crunchy chopped peanuts. I used salted peanuts for this, so it has the added flavour sensation of salted caramel. They were quite special, and the guests I was feeding them to expressed unmasked adoration for them - i.e. they were a HUGE hit.

They're a little bit fiddly, I grant you. However, definitely worth the effort. If you want a little less effort you can skip rolling them in peanuts and just put one on top (like I did to some of mine, above), but they don't quite have the same amazing bang of flavour in your mouth without the salted peanuts.


Ingredients
250g non dairy margarine,butter
3 cups self raising flour
1/2 cup cornstarch
3/4 cup powdered confectioners sugar (or use soft icing mixture)
Egg replacer for 2 eggs (I used Orgran), plus a little extra water to make the mixture stay together.
2 tsp vanilla extract

Caramel and Coating
4 tbsp non dairy margarine
1 tbsp golden syrup
300g sugar
2 cups roasted salted peanuts

To Make
1. Preheat the oven to 170 degrees C.
2. Combine the margarine, flour, cornstarch, powdered sugar, egg substitute and vanilla and beat with a hand held electric mixer until smooth and combined (I'm sure you can do this with a wooden spoon and some elbow grease if you don't have an electric mixer).
3. Line a baking tray with greaseproof baking paper. Roll out piece of the dough about the size of a ping pong ball (you can make them smaller if you wish, just reduce the cooking time). Place on the baking tray, you will most likely need to do two batches.
4. Bake for 18 minutes, remove and allow to cool for 5 minutes on the tray before transferring to a cooling rack. Repeat using any remaining dough.
5. While the second batch is cooking you can get started on your caramel: place the margarine, golden syrup and sugar in a saucepan over a medium heat. Leave on the heat, stirring often, until all the sugar is dissolved. This may take up to 30 minutes.
6. Chop the peanuts up finely and place in a bowl ready to roll.
7. Once the biscuits are cooled and the caramel is ready, start rolling. The caramel will be hot so you'll need to use a couple of forks to dip them in the caramel and then transfer them straight to the peanuts and coat generously. Transfer to a serving plate. You'll want to work quite quickly, as the caramel will thicken as it cools. If you find it becomes too thick to roll the biscuits in, you can put it back on the heat for a few minutes to melt it again.

And then you're done!
Makes 30 biscuits.


This month I'm featuring lots of amazing recipes from Indonesia!
Check out my other Indonesian recipe posts:

Wednesday, 31 October 2012

Chocolate Skeleton Cookies for Halloween

My years of study and my medical degree have all been leading up to this moment - skeleton biscuits. The science nerd in me desperately wanted to have intense attention to detail and anatomical accuracy, but it very soon became apparent that that wasn't going to be possible! Both because of the disproportionate nature of my biscuit cutter and the difficulty of piping small details.


When I was a kid I was one of the only people I knew that went trick or treating for Halloween. This was because we had American neighbours who would organise it in our street and they did a great job of it. Today, mostly because of the rapid Americanization of this country, Halloween trick or treating is becoming slightly more common. But, it poses a new problem for Aussie households, because it's difficult to know if you'll get any kids knocking on your door expecting lollies. 

When I was a kid, our neighbours organised a great system. We would write a little note saying that we would be coming around trick or treating and attached a balloon. People who were happy for us to come to their door would attach the balloon to their letterbox and we only went to the houses that had a balloon out the front. This made it safer for us kids, and easier for the households because if they didn't want to be bothered with us then we didn't come to their door.

Not celebrating any sort of Halloween generally in this country, last year I didn't even know it was Halloween when we heard a little knock on the door and the excited voices of some children. A rapid inventory in my head revealed to me that we had absolutely nothing in the house that we could give them. So, we kept very still and quiet and pretended that we weren't home until they went away. Cowardly? Perhaps. But what could I say to them?

This year I decided to be prepared so I bought some lollies. The problem, however, is that I have no idea how may (if any) kids will knock on my door. So I made some little bags of lollies but if more than 6 kids come knocking on my door then I don't know what I'll do. If less than 6 kids knock on my door then I'll be left with lollies that I don't want which will probably end up in the bin! It's a conundrum really, and makes me think that when I have children I will certainly reinstate the balloon system so that my neighbours will know that 1) my kids are coming and 2) roughly how many kids will be coming!


Even though I don't celebrate Halloween, I decided to give these chocolate skeleton biscuits a try. Why? Three reasons:
1) I thought they would look really cool!
2) The vast majority of my readers are Americans, so I thought they might like them :)
3) If no kids come knocking on my door then at lease I am perfectly happy to eat all these up (unlike most lollies).

In honour of my American readers I have even gone so far as to name these 'cookies'.

Chocolate Skeleton Cookies

Ingredients
1/3 cup canola oil
1/3 cup sugar
1/8 cup pomegranate molasses (of you don't have this then substitute treacle or blackstrap molasses)
1/4 cup rice/soy milk, plus 1 tbsp
1 1/2 cups wholemeal flour
1/2 tsp baking powder
1/2 tsp bicarb soda
1/3 cup cocoa

Icing
38g (approx.) nuttelex (or other non dairy margarine)
1/2 cup soft icing mixture
1/2 tsp vanilla extract

NOTE: I iced my skeletons with a simple buttercream, but if you would rather use a glaze which will set hard (which you would want to if you were wrapping these up to give as a gift, then use the glaze recipe from my Super Gingery Gingerbread People Biscuits)


To Make
1. Whisk the canola oil, sugar, molasses and 1/4 cup milk together. 
2. . Add one cup of flour and whisk through. After this you will want to put the whisk aside and get a wooden spoon because the mix will get too stiff.
3. Add the bicarb, baking powder, cocoa and the other half a cup of flour and mix thoroughly with a wooden spoon. Add the final tbsp of rice milk and knead into a ball (easiest if you just get your hands dirty).
4. Wrap the biscuit dough up in plastic wrap and flatten slightly into a thick disk. Refrigerate for about an hour and a half (or as long as it takes before you have time to make them - you can leave in the fridge for up to 2 days), but make sure you take it out of the fridge 10 mins before using to soften it up a bit.
5. Preheat the oven to 170 degrees C.
6. Flour your benchspace and roll out the dough to about 1/2 cm thick (keep the piece of plastic wrap aside though as you will use it again). Use a person shaped biscuit cutter to cut out the biscuits and transfer them carefully to a tray lined with baking paper (you will want to do this with a thin spatula). Continue until you can't fit any more out of your rolled dough.
7. Grab up all the little extra bits of dough and put them back in the plastic wrap. Wrap tightly and knead a bit before flattening out into a disc shape again (this will smoosh all the pieces together). The roll this piece out and cut some more.
8. Keep repeating step 7 until as many biscuits are cut out of the dough as possible. 


9. Bake each batch for about 7 minutes (if you know your oven is very hot you will probably want to reduce that to 6 mins, or reduce the temp) and then transfer to a cooling rack. Allow to cool completely before icing.


Icing
1. Combine the nuttelex, icing mixture and vanilla in a bowl. Cream together and spoon into a piping bag with a small round tip. Pipe your best skeleton outline onto the biscuits.


Variation
If you don't want to roll out the people shaped biscuits and pipe the skeletons on, you can just roll these into regular round biscuits and then pipe some spiders, bats or spider webs on. It's a bit less effort but still looks pretty cool.


Saturday, 15 September 2012

Awb e Dundawn (Heavenly Afghan Pistachio Biscuits!)


I don't make a lot of biscuits, not really sure why. But making these amazing biscuits makes me want to make them all the time! They are Afghan Pistachio Biscuits, their texture is soft and crumby like shortbread and they're flavoured with the traditional Afghan holy trinity - rosewater, cardamom and pistachios (the basis for all Afghan desserts as far as I can tell!).


Every month I take a country recommended by a reader and feature as many good recipes inspired by that country that I can in a month. Want to see some of the other ones I've had?

January 2012 - Croatia Month
February 2012 - Chad Month
March 2012 - Bosnia Month
April 2012 - Iran Month
May 2012 - Scotland Month
June 2012 - Cambodia Month
August 2012 - Sweden Month
September 2012 - Afghanistan Month

This recipe is also part of the Eating the Alphabet Blog Hop, which this month is using the letters P, Q & R. Lots and lots of choices from those letters. My contribution is Pistachio based, one of my absolute favourite nuts to make sweets out of. This recipe, like a few others featured this month, was adapted from Afghancooking.net. It's a great resource for ideas, however some of the recipes haven't turned out like the photo and description would indicate. This one wasn't an exception. It said to cook the biscuits at 200 degrees C for 10-12 minutes! I gave them the benefit of the doubt and tried it. At 200 they overcooked in about 6 minutes. So I changed the temperature and the time and they turned out much better.


Awb e Dundawn
Adapted from Afghancooking

Ingredients
3 cups wholemeal flour
1 cup soft icing mixture
1 1/2 tsp baking powder
1 tsp ground cardamom
1/2 cup Nuttelex (or other non dairy butter or margarine)
3/4 cup vegetable or canola oil
3 tbsp rosewater, plus 1 tsp
2 tbsp pistachios
Whole pistachios, to garnish

To Make
1. Preheat the oven to 180 degrees.
2. Mix the flour, icing mixture, baking powder and cardamom together in a bowl.
3. Add the Nuttelex and rub into the dry ingredients with your hands until the mixture is the consistency of coarse bread crumbs.
4. Add the oil and rosewater and knead into a ball.
5. Knead with your hands for a few minutes. The mixture will be slightly crumbly, but should stick together into a ball when pressed.
6. Line a baking tray with baking paper. Roll out pieces of the dough about the size and shape of a ping pong ball or a whole walnut. Place them on the baking tray a few centimetres apart.
7. Use your index finger to gently make an imprint on each biscuit, the edges will crack a bit as you do this, but that's ok.
8. Bake for about 8 minutes. The bottoms will be slightly browned but the tops should be still pale. They'll be slightly soft as you take them out of the oven, but will firm up as they cool.
9. While they cool make the pistachio filling. Place the pistachios and the extra 1 tsp rosewater in a food processor. Process until a coarse paste is formed.
10. Place about 1/2 tsp of pistachio paste in the imprint of each biscuit. Decorate with a whole pistachio if you wish.

Makes about 20 biscuits.


Tuesday, 10 January 2012

Paprenjaci (Croatian Pepper Biscuits)


These traditional Croatian pepper cookies are often served at Christmas, but I think they’re so delicious a batch would be welcome all year round! Usually these biscuits would be made with traditional biscuit cutters, so these forked versions aren’t too authentic in the shape department. However, they are authentic in the deliciousness department, and I’m pretty sure that this department wins over all other departments.


Ingredients:
180g Nuttelex
½ cup and 2 Tbsp of sugar
2 Tbsp of golden syrup
1 Tbsp of freshly cracked pepper
1 tsp of ground cloves
2 tsp of ground cinnamon
1 tsp of ground nutmeg
¼ cup of almond meal or finely chopped walnuts
1 ¾ cups of flour

How to make:

1. Cream the nuttelex, sugar and golden syrup in a large bowl.
2. Add the spices and almond meal to the creamed mixture and mix well.
3. Add the flour and mix with your hands, until all ingredients are well combined and have formed a ball of dough.
4. Chill dough for 1 hour in the fridge.
5. Heat oven to 180°c and line a tray with baking paper
6. Roll dough into small balls and press down gently on each side with a fork, so that they look something like this:


7. Bake for 20-25 minutes, cool and serve!

Makes around 15 biscuits.


Check out our other recipes for Croatia Month:


Yumuşacık Poğaça 
(Savoury buns filled with creamy potato and pickles!)

(Rice-filled cabbage rolls)


(Poppy Seed Strudel)


Friday, 23 December 2011

Edible Christmas Gifts Part 4: Orange & Pistachio Shortbread


Christmas? No Problem, Man. I've just finished making all my Xmas presents today - and man it feels good to have it all done. Above we have (L-R): Cranberry and Almond Biscuits, Orange and Pistachio Shortbread and Tahini and Lime Biscuits - all vegan of course because that is what we do here at G w/ A & K. My family and friends will also be getting a lovely array of home made jams, for details and recipes see Edible Christmas Gifts Part 1.... and apologies to any family who are reading this and just got their Xmas gift surprise ruined....

So when I sat down to plan my Xmas biscuit jars I immediately remembered A-dizzle's delicious Spiced Vegan Shortbread recipe posted up recently. So I decided to use that and to make a variation on this great shortbread, so that I could offer up another Xmas gift idea: Orange and Pistacho Shortbread. 

Ingredients:
1 cup of nuttelex or other non-dairy butter/margarine
½ cup of brown sugar
1 tsp of vanilla extract
1 tsp orange essence
2 1/4 cups of plain flour 
1 tbsp orange zest
1/3 cup shelled pistachios (measure first, then chop finely)

To Make:

1. Preheat your oven to 180° (conventional) or 160° (fan forced).
2. In a large bowl, cream the nuttelex, sugar, orange extract and vanilla extract together with an electric mixer. Add the orange zest and mix again.
3. Add the flour and spice mix (1/2 cup at a time) to the nuttelex and mix well with a spoon or your fingers until a smooth, even and firm dough has been formed. This should only take a couple of minutes.
4. After lining a tray with baking paper, roll small balls out of the dough and press each down gently with two fingers. After pressing down each ball, you can press down on each side of the biscuits with a fork to create a design.
5. Place your shortbread in the oven for 20-25 minutes. They should still look nice and pale and feel a bit too soft to touch (don't worry they will firm up as they cool), if they feel hard and biscuity straight out of the oven they are over cooked.
6. You can now remove your shortbread biscuits from the oven, cool them for 10 minutes and enjoy!

Makes about 26 biscuits.

Want more Special Edible Gift Ideas? Check out the rest in this series of posts:
Edible Gift Ideas 1: Jams!! (several of them!)
Edible Gift Ideas 2: Super Gingery Gingerbread People
Edible Gift Ideas 3: Spiced Shortbread

And if you are in the Xmas spirit:
Chocolate Ice-Cream Christmas Pudding
Mulled Spiced Cider


Saturday, 17 December 2011

Edible Christmas Gifts Part 3: Spiced Christmas Shortbread


A plate of these babies will look and taste great on the table at Christmas. Better yet, fill a jar with your awesome and easy to make shortbread, tie a festive ribbon around the top and... BOOM! You have an inexpensive and tasty gift to give!

Ingredients:

1 cup of nuttelex or other non-dairy butter/margarine
½ cup of brown sugar
2 tsp of vanilla extract
2 cups of plain flour (white or wholemeal)
4 tsp of ground cinnamon
½ tsp of ground cardamom
½ tsp of ground cloves

To Make:

1. Preheat your oven to 180° (conventional) or 160° (fan forced).
2. In a large bowl, cream the nuttelex, sugar and vanilla extract together by mixing until smooth. I find it is easiest to do this with a fork (or an electric mixer if you have one).
3. In a separate bowl, mix the flour and spices together until combined.
4. Add the flour and spice mix (1/2 cup at a time) to the nuttelex and mix well with your fingers until a smooth, even and firm dough has been formed. This should only take a couple of minutes. If it is too sticky you may need to add a bit more flour.
5. After lining a tray with baking paper, roll small balls out of the dough and press each down gently with two fingers. After pressing down each ball, you can press down on each side of the biscuits with a fork to create a design.
6. Place your shortbread in the oven for 20-25 minutes and...
7. You can now remove your shortbread biscuits from the oven, cool them for 10 minutes and enjoy!

Note: Feel free to sprinkle these with icing sugar and/or cinnamon.

Makes 25-30 biscuits.

For a variation on these, try K-bobo's Orange and Pistachio Shortbread!


Tuesday, 13 December 2011

Edible Christmas Gifts Part 2: Super-Gingery Vegan Gingerbread People Biscuits


Gingerbread Men and Women are generally awesome - and are even more awesome when they are made to look like your friends (ok, not actually like them very much) as gifts to give to them for Xmas. For example, in the above picture we have (starting from top left and going clockwise): K-bobo, Katie-Cuddlepot, Daniel, Ben, Super Sophie, Chris, Paolo, Leobean and A-dizzle.

These particular gingerbread people are extra gingery with a double ginger hit so if your friends and family don't like ginger...... well...... don't make them these.... or divorce them. Don't worry A-dizzle will be posting some awesome Xmas shortbread recipes for those of your family and friends that don't do ginger. 

Ingredients
1/3 cup canola oil
1/2 cup sugar
1/8 cup blackstrap molasses (just fill a 1/4 cup measurement halfway)
1/4 cup almond milk or soy milk
2 cups plain wholemeal flour
1/4 tsp salt
1/2 tsp baking powder
1/2 tsp bicarb soda
2 1/2 tsp ground ginger
1/4 tsp ground cloves
1/2 tsp ground cardamom
1/2 tsp ground cinnamon
1/2 tsp ground nutmeg
1/4 cup crystallised (or you can also use glacé) ginger, chopped very finely

To Make:
1. Preheat your oven to 180 degrees C, or about 160 if your oven is fan forced.
2. In a bowl whisk together the oil, sugar, molasses and milk until well combined.
3. Add one cup of flour and whisk through. After this you will want to put the whisk aside and get a wooden spoon because the mix will get too stiff.
4. Add the bicarb, baking powder, spices and the other cup of flour and mix thoroughly with a wooden spoon (this will help develop your huge biceps so you may like to even out the other side by stirring a bit with your left (or non dominant) hand). Stir through the finely chopped ginger.
5. Wrap the biscuit dough up in plastic wrap and flatten slightly into a thick disk. Refrigerate for about an hour and a half (or as long as it takes before you have time to make them - you can leave in the fridge for up to 2 days, but make sure you take it out of the fridge 10 mins before using to soften it up a bit).
6.Flour your benchspace and roll out the dough to about 1/2 cm thick (keep the piece of plastic wrap aside though as you will use it again). Use a person shaped biscuit cutter to cut out the biscuits and transfer them carefully to a tray lined with baking paper (you will want to do this with a thin spatula). Continue until you can't fit any more out of your rolled dough.
7. Grab up all the little extra bits of dough and put them back in the plastic wrap. Wrap tightly and knead a bit before flattening out into a disc shape again (this will smoosh all the pieces together). The roll this piece out and cut some more.
8. Keep repeating step 7 until as many biscuits are cut out of the dough as possible. Here they are before cooking:


9. Bake each batch for about 8 minutes (if you know your oven is very hot you will probably want to reduce that to 6-7 mins, or reduce the temp) and then transfer to a cooling rack. Allow to cool completely before icing.

Makes 22 Gingerbread People (may vary depending on the size of your cutter).

Now the icing...
How much effort you want to go to really depends on how much time you have. You can make do with just eyes and mouth or you can go the whole shebang and give them little outfits.

Ingredients
1 1/2 cups soft icing mixture
2 tbsp soy milk
Food colourings (of your choice)
Coloured sprinkles (if you want - I used them to make A-dizzle's awesome colourful tights because she always wears awesome tights)

To Make:
1. Put icing sugar in a bowl and add 2 tbsp soy milk. Mix well with a butter knife. 
2. Consistency should be like toothpaste, nice and thick but easy to pipe. If it is too dry add 1/2 tsp more soy milk, alternately if you find it is too runny you can add a little more icing mixture.
3. Split icing into 3 containers and add a different colour to each one (I used green, yellow and hot pink).
4. Put into piping bags with the thinnest nozzle you have and go crazy on the little divas!
5. If you want to use the coloured sprinkles just smear some icing on first so that they stick (I made a small amount of brown icing using a bit of cocoa powder to use for sticking sprinkles to - but you can use the coloured ones too).

Here are all the other ones that I made too:

And all of them together: