Showing posts with label corn. Show all posts
Thursday, 4 June 2015
Corn & Tofu Soup
About a week and a half ago we flew home from holidaying in The Maldives, which looked like this:
Back home now and it's officially "unseasonably cold". Sad face. There is only one upside - for the last week or so we have been having soup for dinner most nights. It's perfect on four fronts - warming, easy, cheap and healthy! We overindulged a lot while travelling (of course) and although I have absolutely no regrets, it doesn't hurt to have a healthy couple of weeks now that we're back.
I made this delicious Corn & Tofu Soup when we had people over for dinner the other night and it was incredibly popular, including some people saying they 'don't usually like soup' (causing me to question why I'm friends with such people) but loved this one. A few asked for the recipe, so I've made sure I blogged it nice and quick.
It only takes about 15 minutes to make, which it another point in it's favour. You could also opt to puree it at the end, if you like creamy soups, but then you'll loose the nice texture of the pieces of tofu.
Corn & Tofu Soup
Ingredients
1 onion, diced
1 tbsp margarine
2 cloves garlic, crushed
2-3cm fresh ginger, peeled and grated
1 tomato, finely diced
200g hard tofu, cut into small cubes
500g corn kernels (use fresh, frozen or canned)
1 x 400g can of creamed corn
1 litre vegetable stock
Salt and pepper, to taste
To Make
1. Heat the margarine in a large soup pot and saute the onion until translucent. Add the garlic and grated fresh ginger and give it about another minute.
2. Add the tomato and the tofu and cook for a further 1-2 minutes. Then add the corn, creamed corn and vegetable stock and bring to a simmer. Simmer for about 10 minutes, and then season to taste with salt and pepper. Serve hot.
Serves 4. If you're big soup lovers, make a double batch and eat it for lunch as well!
Wednesday, 20 May 2015
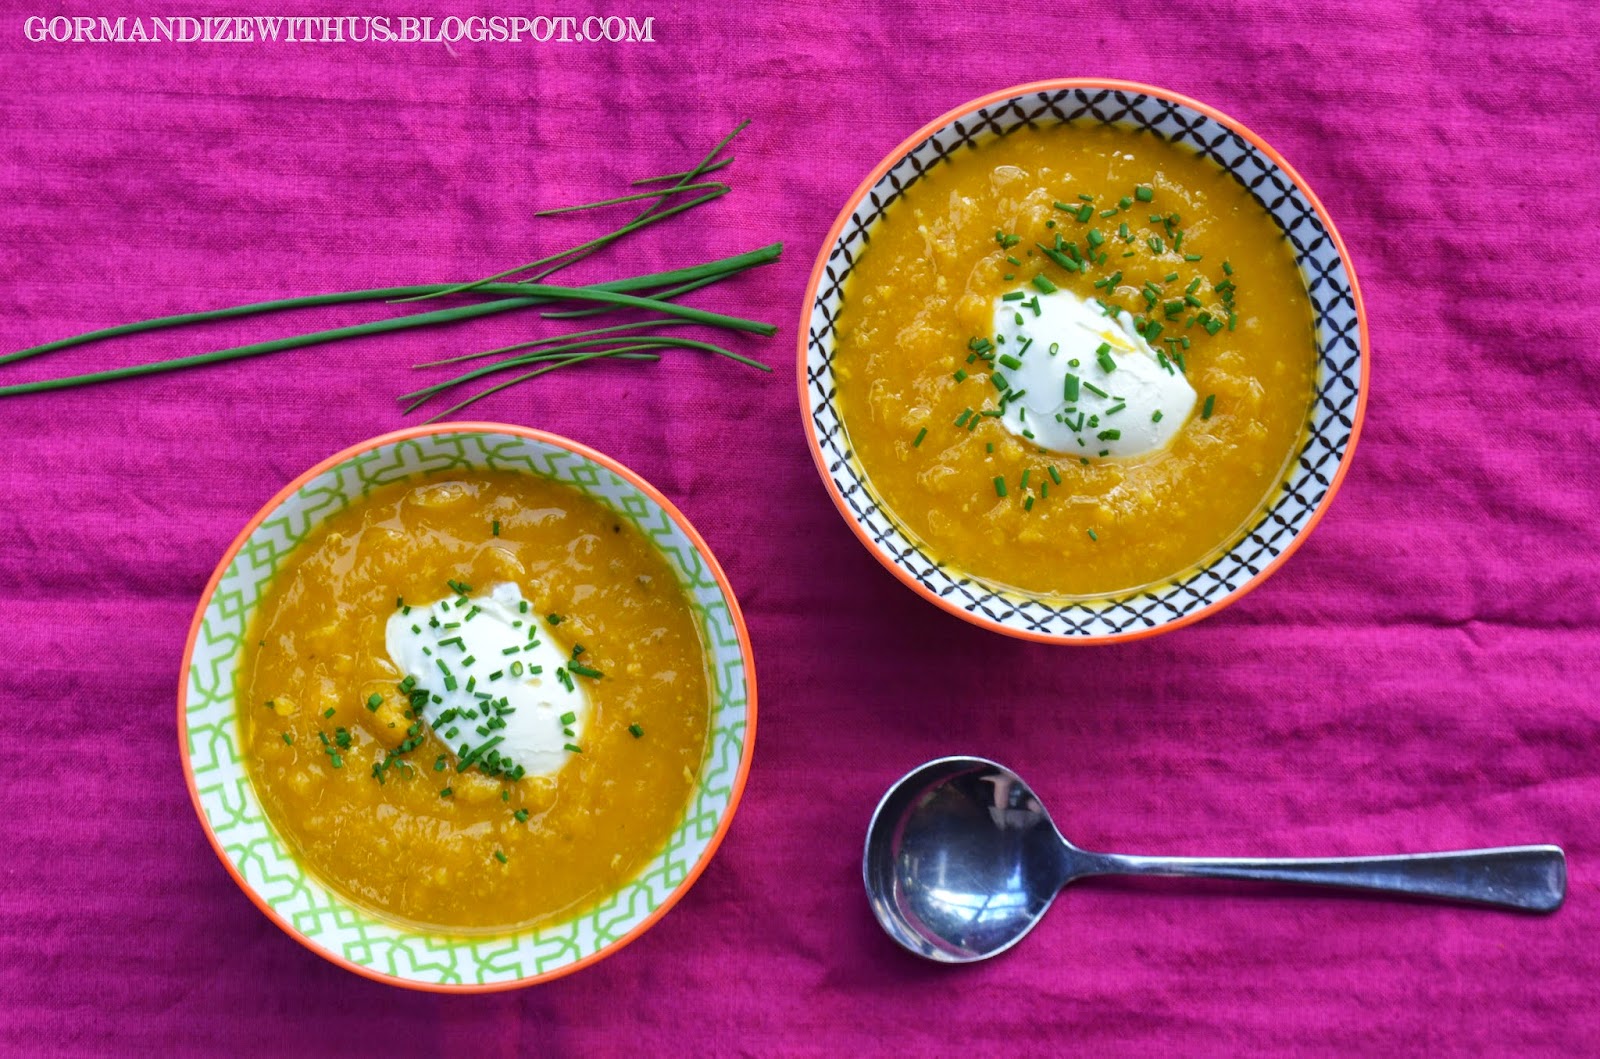
Pumpkin & Sweetcorn Soup
I'm not generally a big fan of cold weather, but when it starts to move in I try and look on the bright side. For me, there are only two pros to winter; one is climbing into a bed which has been pre-warmed by my electric blanket and the other is gorgeous soups and stews. Pumpkin is a classic which comes out every autumn. I've eaten a lot of pumpkin soup in my life and it always surprises me how often it is incredibly average. It's one of those dishes that everybody makes, but not everybody makes well.
You can make this recipe as a straight pumpkin soup, without the corn. I have to thank my partner for the addition of the corn, I had never even thought of putting corn in my pumpkin soup before but he would often cook us pumpkin and sweetcorn soup for a winter dinner. In this recipe I've combined my favourite pumpkin soup with his version to make probably the best one I've ever eaten :)
Pumpkin & Sweetcorn Soup
Ingredients
1 kg pumpkin, skin removed an chopped
1 onion, chopped
1 large carrot, chopped
1 medium potato, peeled and chopped
1 large stick celery (including leaves), chopped
1 parsnip, peeled and chopped (optional)
1 bay leaf
2 heaped tsp powdered vegetable stock
3/4 tsp ground cumin1/2 tsp ground ginger
2 x 400g cans creamed corn
Salt and pepper, to taste
To serve: vegan sour cream and chopped fresh chives.
To Make:
1. Boil the kettle while you chop all your veggies up.
2. Combine the pumpkin, onion, carrot, potato, celery, parsnip, bay leaf and powdered vegetable stock in a big soup pot. Add enough hot water so that it is just below covering all the vegetables and bring to a simmer.
3. Simmer, covered for about 20 minutes. Stir every now and then to ensure that the veggies on top get cooked too, as they cook down they will release their own liquids and there will be enough water in the pan to cover all the veg but if you put in too much water at the start then you'll end up with watery soup.
4. Remove the lid and add in the ground cumin and ginger. Simmer, uncovered for another five minutes. Remove from the heat and all to cool until it is cool enough to blend.
5. Blend until smooth (a few chunks are ok too) and then return to the heat. Add the 2 cans of creamed corn and stir though, leaving it on the heat until heated through. Season generously with salt and pepper.
6. Serve hot with a dollop of vegan sour cream, chopped fresh chives and warmed crusty bread.
Serves 4 (with bread).
Friday, 16 January 2015
Polenta & Pumpkin Mash
Mash is a wonderful comfort food, it speaks of curling up with a blanket on the couch and watching DVDs. Or lazy summer days when you're too lazy to want to chew food properly :) Potatoes are the classic option; I used to cook up a big bowl of mashed potato and smother it with gravy whenever I had an evening alone and just me to cook for. Sometimes I'd add some veggie sausages and peas, but often I'd just go with the big bowl of mash and gravy.
I love potato mash, but it's nice to mix it up and sometimes make your mash a but more nutrient rich! There are plenty of alternatives, and I love them all - parsnip, pumpkin, cauliflower, celeriac, swede, carrot, sweet potato - or a big amalgamation of all of them. You don't really need recipes for those though, it's not hard to figure out mash :)
This one is a little bit special, actually quite a lot special. In fact, it may be the best mash I've ever eaten.
Polenta & Pumpkin Mash
Ingredients
500g chopped pumpkin (skin removed)
3 cups vegetable stock
1 1/4 cups polenta
Salt and pepper to taste
To Make
1. Bring the vegetable stock to a simmer in a saucepan. Add the pumpkin and simmer, covered, until the pumpkin is very soft (about 15 minutes, unless you have chopped your pumpkin big in which case longer).
2. Mash up the pumpkin in the stock (or you can blend the whole lot of it if you like it very finely puréed). Check the water level and replenish it with extra stock if it has boiled down significantly while you were cooking the pumpkin.
3. Place the pan over a low heat and add the polenta, stirring as you do. Stir continuously over a low heat until the polenta absorbs all the liquid and becomes fairly thick and then remove from the heat. Taste test to make sure it is cooked, if it is grainy, add a little more hot vegetable stock and stir until it is absorbed.
4. Season to taste with salt and pepper (or even a dollop of vegan margarine if you're so inclined).
Serves 4 as a side.
NOTES - There can be variations in quantities due to the water content of the pumpkin you use and how much liquid evaporates while you're cooking it. If the polenta is too runny and sloppy, you may need to add more polenta to soak it up. If it is too dry and the polenta is undercooked and grainy, add a bit more hot vegetable stock until you get it just right.
Friday, 27 June 2014
Bollos de Mazorca
Another beautiful corn recipe for Panama month - corn is certainly the flavour of the month here! This recipe is so absurdly simple, and really celebrates the gorgeous sweet taste of fresh corn. You'll need to make sure you buy your corn with the husk on, if your greengrocer has them de-husked and pre packaged then you can just ask them if they have any with the husks on, they usually have a box out the back.
This dish is usually made using dried corn in Panama, I've used fresh. It's obviously a bit juicier than dried corn, so I've used a couple of tablespoons of polenta to soak up the liquid. It doesn't affect the taste, just absorbs the corn juice while it cooks and makes it a lovely firm consistency.
Bollos de Mazorca
Ingredients
6 ears of fresh corn, with husks on
2 heaped tbsp polenta
Pinch of sugar
1/4 tsp salt
To Make
1. Remove the husks from the ears of corn. Discard the corn silks (or feed them to your guinea pigs, who love them!) and place the husks in a bowl of hot water to soften.
2. Cut the kernels off the cobs of corn and purée in a food processor. Strain through a sieve to get as much liquid out of the puréed corn as you can (save the lovely liquid and use it to flavour a corn soup or chowder).
3. Place the strained corn purée, polenta, sugar and salt in a bowl and mix well. Remove the husks from the water and fill each one with 2 tablespoons of corn. Roll them up and tie the ends together with twine and place in a steamer. Keep going until you've used up all the corn purée.
4. Steam, covered, for 40 minutes. Serve hot, if you like you can add a dab of vegan butter or margarine just before eating.
Makes 18-20 bollos.
This
month I'm featuring recipes from Panama.
Check
out my other Panamanian recipe posts:
I've submitted this recipe to the Vegan Virtual Linky Potluck - click here to see the other entries.
Wednesday, 18 June 2014
Sweet Corn Cake (Vegan) with Lemon Glaze
This one isn't really an Panamanian recipe, but it was inspired by Panama month. Actually it was inspired by this Sweet Corn Ring recipe, but this recipe is a savoury recipe whereas I wanted to make an actual cake. Corn is so sweet that it really makes a natural choice for desserts, even though most people wouldn't think of it. Adding lots of lovely puréed sweet corn means you don't need nearly as much sugar, and the end result is perfectly balanced in sweetness. And don't worry, it doesn't feel like eating vegetables for dessert - it feels like eating cake! Cake with delicious tangy lemony glaze.
Sweet Corn Cake with Lemon Glaze
Ingredients
1 cups corn kernels (either fresh or tinned, drained & rinsed)
2 cups soy, almond or oat milk
2/3 cup canola or rice bran oil
1/2 cup sugar
2 1/2 cups wholemeal flour
2 tsp baking powder
1 tsp bicarb soda
1 cup soft icing mixture
2-4 tbsp fresh lemon juice
To Make
1. Preheat the oven to 180 degrees C.
2. Purée the corn kernels and place in a bowl. Stir in the soy milk, oil and sugar.
3. Add the flour, baking powder and bicarb soda.
4. Pour the batter into a greased ring shaped baking tin. Bake for 45 minutes, or until a knife inserted into the middle comes out clean.
5. Turn out onto a cooling rack and cool completely before glazing. While it's cooling, you can make the glaze by putting the icing mixture into a small bowl and gradually adding lemon juice until you have it just think enough to drizzle, but still quite thick (if it's too thin it'll just run right off the cake and pool on the plate).
6. Once the cake is completely cool, drizzle all over with the glaze.
This
month I'm featuring recipes from Panama.
Check
out my other Panamanian recipe posts:
Thursday, 12 December 2013
Za'atar Cornbread in a Jar (Homemade Edible Christmas Gifts)
You might notice a slightly *cornbready* theme to my Edible Xmas posts this year, as I've already posted my Chilli Cornbread in a jar. Well, I got onto a good thing and I ran with it. This cornbread is made with Za'atar - a middle eastern herb and spice mixture. Ingredients can vary, but it's commonly made using thyme, marjoram, oregano, sesame seeds, sumac and sometimes other spices. It has a strong taste, and I advise you to only give this gift to somebody that you already know loves za'atar!
Here is what you'll need:
1 x empty 500ml jar with a lid
1 cup plain wholemeal flour
1/4 cup baking powder
2 tbsp za'atar (add more if they absolutely love it, but no more than 4 tbsp)
1 cup polenta
You'll also want:
A funnel to get everything into the jar in neat layers
Cardboard tags or Xmas tags
Ribbons for decorating and tying the tag on.
Assembly...
Using a funnel, layer the ingredients into the jar. Start with the flour, then the baking powder, then the za'taar and then the polenta. If you find that your jar is slightly bigger and not completely full, just add a bit more polenta to fill it up, it should work out fine.
Now: Here is what your label should say:
Za'taar Cornbread
To Make:
1. Preheat oven to 180 degrees.
2. Empty contents of jar into a large bowl.
3. Add 1 cup soy milk, 1/3 cup canola oil and 1/3 cup water. Mix.
4. Grease a loaf tin or small/medium baking dish. Pour in batter.
5. Bake for 20-25 minutes. Eat!
Want more Edible Gift Ideas?
Homemade jams
Sunday, 1 December 2013
Chilli Cornbread in a Jar (Edible Christmas Gifts)
December has arrived yet again and it's time to get seriously organised about Xmas! A bit of planning now can save you plenty of stress later, so let's talk about edible Xmas gifts. I make edible Xmas gifts every year. They're a win/win, because they work out cheaper for me and the person getting it doesn't risk getting something they don't actually want or need. They also work well if you're put in a position where you have to buy something for someone you don't actually know very well (teachers, neighbours, work colleagues, in laws, girlfriends/boyfriends that family members are bringing to Xmas, the cousins that you only ever see at Xmas). An edible gift means you don't risk cluttering up their lives/houses with something they don't want/need. It also means you don't risk wasting your money on something that they might just re-gift or throw out.
In the past I've done plenty of cupcakes and biscuits for people, which is lovely. But sometimes it's good to go a little bit healthier. Maybe your mum is trying to lose some weight, maybe your grandmother isn't in the best of health, maybe your cousin is diabetic or maybe you know that they all eat way too much junk anyway and they don't need more chocolate and biscuits. Or maybe, you just want to do something a bit different.
People who love chilli are great to buy for. You can always hand over a bottle of fancy chilli sauce or some home made chilli jam or chilli vodka and you know they'll be thrilled. If you have a chilli lover in your family or friends then this chilli cornbread is a great and unique gift! The jar contains all the dry ingredients for a hot chilli cornbread, with a tag attached explaining a simple recipe for cooking it up. They don't have to be a cooking enthusiast to make it, it's as easy as A, B, Chilli!
1 x empty 500ml jar with a lid
1 cup plain wholemeal flour
1/4 cup baking powder
2 tsp cayenne pepper
1 cup polenta
1-3 tsp chilli flakes (depending on how hot they like it!)
You'll also want:
A funnel to get everything into the jar in neat layers
Cardboard tags or Xmas tags
Ribbons for decorating and tying the tag on.
Assembly...
Using a funnel, layer the ingredients into the jar. Start with the flour, then the baking powder, then the cayenne pepper and then the polenta. Add the flaked chilli on top so that they get a surprise when they open the jar (more chilli!). If you find that your jar is slightly bigger and not completely full, just add a bit more polenta to fill it up, it should work out fine.
Now: Here is what your label should say:
Chilli Cornbread
To Make:
1. Preheat oven to 180 degrees.
2. Empty contents of jar into a large bowl.
3. Add 1 cup soy milk, 1/3 cup canola oil and 1/3 cup water. Mix.
4. Grease a loaf tin or small/medium baking dish. Pour in batter.
5. Bake for 20-25 minutes. Eat!
Want more Edible Gift Ideas?
Homemade jams
Cranberry, Apple and Cinnamon Infused Vodka
Monday, 27 May 2013
Argentinian Sweetcorn Empanadas
A foray into Argentinian food wouldn't be complete without some empanadas, they're iconic. They're also really versatile - you can make them with any filling you like. Traditional fillings include beef, cheese, corn, pumpkin, sweet potato or fruits like apple. I've made these ones with a creamy and delicious sweetcorn filling.
In all honesty, I found these a little challenging and it took me a couple of tries to get it right. I generally prefer wholemeal so I made my first batch with all wholemeal flour but it made the dough less pliable and I couldn't do a very neat 'repulgue' on the edges. So the next batch I used a combination of white and wholemeal flour and they turned out much better.
I also struggled with the fact that none of the recipes in my cookbooks or on the internet for empanadas told me to poke holes in the top of the empanadas to let the steam out while they cooked. So I didn't - for my first two batches. The result was that they puffed up a lot and many of them burst open while they were cooking. So I poked holes in my second batch and they worked much better - none of them burst open and they didn't puff up so much. If anybody knows the secret to not poking holes in them and still getting them to work then please let me know!
1 batch empanada dough (I just used this recipe from Global Table Adventure, but I used 1 1/2 cups white flour and 1/2 cup wholemeal flour)
Soy milk, for brushing
Filling
4 tbsp non dairy butter or margarine
4 tbsp plain flour
1 cup non dairy milk (I used oat milk - but use soy, almond or rice etc.)
1 x 300g creamed corn
1 x 300g corn kernels, drained
1/4 tsp ground nutmeg
1/4 tsp salt
1/2 tsp cracked black pepper
To Make
1. Make the empanada dough and put it in the fridge while you make the filling. You'll also want to preheat your oven to 180 degrees C.
2. Melt the margarine in a small saucepan and then add the flour. Stir continuously while it heats through and starts to cook a little, about 1-2 minutes.
3. Gradually add the milk while stirring vigorously until you have added it all. You should have a thick sauce now.
4. Remove from the stove and then add the creamed corn, corn kernels, nutmeg, salt and pepper. Mix well.
5. Roll the dough out on a floured bench top quite thin. Use a cutter or a bowl with a diameter of 12-13cm to cut out circles in the dough.
6. Place about a dessert spoon of the filling in the centre of the circle. Dampen the edges with water and press them together. You can just use a fork to press the edges together or you can try the traditional repulgue edging - there is a video on Global Table Adventure.
7. Continue with remaining dough and filling - you may have some filling left over (you can use these in some store bought puff pastry to made little triangles or money bags).
8. Arrange on a tray and use a fork to poke some holes in the top. Brush with milk and bake for about 15 minutes, or until golden brown on top.
Makes 16 medium sized empanadas (and a little leftover filling).
This
month I'm featuring lots of recipes from Argentina!
Check
out my other Argentinian recipe posts:
Saturday, 9 February 2013
Chayote con Maiz (Costa Rican Chokos and Corn)
When I started researching Costa Rican food to make this month, I quickly realised that there are a LOT of essential Costa Rican ingredients that I just can't get my hands on. I started to compile a list of the ingredients that I kept finding in recipes again and again and again. I wish I could have bought and tried all these, but I guess I'll just have to wait until I can finally travel to Costa Rica.
Things I Can't Get Near Me:
Plantains (sob!)
Pejibayes
Yuca
Achiote (paste)
Ayotito
Arracahe
Chicasquil
:(
I also kept finding recipes online which called for chayote. Not knowing what a chayote was, I put it down on the list and discarded all the recipes. Then, in a stroke of genius which rarely occurs - I thought I might just google chayote to see what it was. To my surprise I discovered that I was actually familiar with it - I just know it by a different name: Choko. You know, these fellas:
I've eaten choko since I was a kid and I've always really liked it, although I know that not everybody is as keen! Infact I've heard rumours that McDonald's Apple Pies used to (or still do?) contain quite a lot of choko because the flesh holds it's shape well, has a mild taste and looks pretty similar to apple when cooked. I don't know if that is true, but it sounds pretty plausible to me.
It turns out that chokoes go by many different names. You might also have heard them called Christophenes. In fact according to wikipedia (get your grain of salt ready) it's also known as:
- cho-cho
- mirliton/merleton
- vegetable pear
- pear squash
- chuchu (in Brazil)
- Centinarja (in Malta)
- chouchoute
- pipinola
You certainly learn something every day! So, once I realised that chayotes were actually chokoes and that I could get my hands on them, chayote was back on the menu! I started searching around for a good choko recipe from Costa Rica and ended up being emailed one by an awesome Costa Rican named Kimberly who out of the goodness of her heart took the time to type it all up for a complete stranger. Sometimes the internet reminds you that the world is a wonderful place (even though a lot of the time it reminds you that the world is full of horrible and cruel people).
Ingredients
3 med-large chokoes (chayotes)
2 tbsp olive oil
2 onions, finely diced
3 garlic cloves, finely minced
1 tsp ground cumin
1/2 tsp ground coriander
Salt and cracked black pepper
1 tin sweet corn kernels, drained (you can also use 1 cup frozen corn, or 1 cob fresh corn)
1/4 cup rice milk
1 tbsp sugar
To Make
1. Peel the choko and chop into cubes (NOTE: it is a good idea to use gloves when peeling and cutting choko, as it's juices irritate the skin and leave you with a very unpleasant dry and tight feeling on your hands).
2. Heat the olive oil in a pan and add the onions and garlic, sauté until soft.
3. Add the chopped choko, cumin, corainder, salt and pepper and cover with a lid. Cook over a medium heat for about 10 minutes.
4. Add the corn, rice milk and sugar. Cook, uncovered, until the choko is cooked (it should be tender to pierce but still firm enough to hold it's shape) and the milk has cooked down by about half. Stir well and serve.
Serves 4 with tortillas (and any other accompaniments).
This month I'm featuring lots of delicious food from Costa Rica.
Check out my other recipe posts:
Thursday, 20 December 2012
Succotash (American Beans and Corn)
I'm actually finding it quite challenging to fit all my Southern USA posts and my Xmas posts in at the moment, especially because I'm also busy getting everything ready for Xmas itself! But I've managed to find a few minutes to share another recipe with you from Southern USA. It's a deceptively simple one. You might look at it and think it'll be a bit ordinary, but you have to believe me when I say it is quite special. Simple - yes. Easy - yes. Healthy - yes. But also full of flavour!
Succotash
Ingredients
2 tbsp olive oil
1 onion, peeled and diced
4 cloves garlic, peeled and crushed
4 tomatoes, chopped
1 tsp ground cumin
3 cobs fresh corn
2 x 400g cans lima or butter beans, drained and rinsed
1 jalapeño chilli (I used preserved ones from a jar, so they are slightly milder. If you use fresh, just use half)
1/2 cup vegetable broth
salt and pepper to taste
To Make
1. Heat oil in a large pot over a medium heat. Add the onion and saute for about 5 minutes, or until transulcent. Add the garlic and cook for a further 1-2 minutes.
2. Add the tomatoes (including any juices) and cumin and cook for 2-3 minutes.
3. Cut the corn kernels off the cob (reserve as much of the liquid that comes out if it as well). Add the corn (and any corn juices), beans, chopped jalapeño and vegetable stock.
4. Simmer, covered for about 10 minutes. Remove lid and simmer for a further 10-15 minutes, or until the liquid has reduced.
5. Season to taste with salt and pepper and serve hot.
Serves 4
This month I'm featuring lots of delicious food from
Southern USA.
Check out my other recipe posts:
Monday, 17 December 2012
Vegan Chili Pone (Texas Chili Con Carne Casserole with Cornbread)
This month is Southern USA month, and I feel like it wouldn't be complete without a shoutout to the American phenomenon of "chili". Because I'm focusing on Southern USA, of course I'm talking this time about "Texas Chili". This is a dish which presents a challenge to non meat eaters. Why? Because Texans are adamant that Chili should not contain beans (more is the pity!). I'm also allergic to capsicum which means that is out for me as well. So if I remove the meat and capsicum from my Chili and I'm not allowed to put beans in - what am I left with?? Tomatoes, onions and chilli. Not really enough to work with.
So I decided to substitute the meat with bulghur, which has a similar chewy 'minced' sort of texture. It doesn't taste like beef of course, but I put in a bit of beef stock (no animal content) to try and beef it up a bit. Excuse the pun. Since it was a pretty simple Chili, I decided to make it into a 'Chili Pone' (I'm not sure how that is pronounced - is it pone to rhyme with cone?). I'd never heard of this before, but it was suggested to me by a reader when I started featuring Southern USA food. Chili Pone is a casserole of Chili topped with cornbread, which sounded right up my alley because I love cornbread!
I've made cornbread for this blog before, my Razlevjak (Bosnian Cornbread).But I'm always happy for an excuse to experiment with cornbread! A few things I should point out about it - firstly, American cornbread it made with cornmeal. Cornmeal is slightly finer ground than polenta and slightly coarser than maize flour (not to be confused with cornflour/cornstarch which is the white powder used for thickening). As far as I'm aware I've never seen this cornmeal as defined this way in stores in Australia. I have access to maize flour, corn starch and polenta. So, I used polenta because I didn't have any cornmeal and because I love the textured corny taste that polenta gives to cornbread.
Secondly, I was told adamantly by an American that Southern cornbread is unsweetened, so despite the fact that most of the Southern Cornbread recipes I found on the internet involved adding sugar, I left out the sugar.
The result? The cornbread casserole idea is genius and I'm going to make so many more casseroles with cornbread on top now! The Chili turned out delicious, although, I have to say would have been even better with some beans in it :)
Southern USA Chili Pone
Ingredients
Bulghur Chili
2 tbsp oil
1 large onion, peeled and diced
4 garlic cloves, crushed
1 jalapeño chilli, fresh or preserved
1 tsp cumin
1 tsp sweet paprika
1/2 tsp smoky paprika
1/2 tsp cayenne pepper
1/2 cup bulghur
6 tomatoes, chopped
2 tbsp chopped fresh oregano
1 cup strong beef stock (use a vegetable based stock powder such as Massel)
1 tbsp soy sauce
3 tbsp tomato paste
Cornbread
1 cup soy milk
1 tsp apple cider vinegar
1 tbsp ground flaxseeds
1 cup flour
1 cup polenta
1/2 tsp salt
1/4 cup baking powder
1/3 cup oil
1/3 cup water
To Make:
1. Preheat the oven to 180 degrees C.
2. Heat the oil in a large saucepan and sauté the onion until soft. Add the garlic and jalapeño, and sauté a further 2 minutes.
3. Add the dry spices and cook for another 30 seconds then add the bulghur and stir to coat with the spice mix.
4. Add the tomatoes, oregano, beef stock, soy sauce and tomato paste. Bring to a gentle simmer and cook, covered, for 20 minutes.
5. To make the cornbread: combine the soy milk, apple cider vinegar and ground flaxseeds. Whisk together and set aside for about 5 minutes to curdle and thicken.
6. In a separate bowl, combine the dry ingredients and stir well. Make a small well in the middle of the dry ingredients and add the soy milk. oil and water. Mix well until it forms a smooth batter.
7. Once the Chili is cooked, remove from heat and transfer to a medium sized casserole dish. Spoon the cornbread batter over the top of the Chili. It doesn't have to be too neat, as the cornbread will expand and rise to create an even covering as it cooks.
8. Bake, uncovered, in the oven for 20-25 minutes, or until the cornbread is crisp and golden. Serve.
This dish can also be made in advance and reheated in the oven. It is important, however, to always reheat the dish (and the leftovers) in the oven, otherwise the cornbread will go soggy!
Serves 4-6.
This month I'm featuring lots of delicious food from
Southern USA!
Check out my other recipe posts:
Sunday, 11 March 2012
Vegan Razljevak (Bosnian-style Cornbread)
This cornbread is nothing short of perfect. The first sense you get of it is the tantalising aroma of baking corn, like some kind of rustic magic is happening. Then, when you take it out of the oven and test it you'll notice how perfectly springy is feels under your touch, yet firm and full of corn! Cornbreads have three possible drastic possibilities: too dry and heavy, too thick and soggy or light and fluffy just like bread but with no cornmeal in sight. This bread is none of these things. It rose slightly, but not too much. The crust was beautifully crusty but the inside was light and fluffy and perfect with any soup, stew, beans, casserole or chilli. If you want a taller loaf just double the recipe.
Ingredients
1 1/2 cups soymilk
1 tsp apple cider vinegar
3/4 cup wholemeal flour
1/2 cup cornmeal (polenta) plus 1 tbsp
1/2 cup semolina
2 tsp baking powder
1 tsp salt
1/3 cup apple sauce
1/3 cup vegetable oil
To Make:
1. Preheat the oven to 180 degrees C.
2. Whisk the soy milk and vinegar together and set aside to curdle sightly.
3. Grease a loaf pan with non dairy butter or margarine and sprinkle 1 tbsp cornmeal evenly over the bottom of the dish.
4. Sift all the dry ingredients together in a bowl and mix well to combine. Add the rest of the ingredient and mix to combine. The batter should be quite thin and pourable.
5. Pour into the loaf tin and bake for 20 minutes, or until a knife comes out clean when inserted into the centre of the loaf.
6. Turn out of the tin and allow to cool slightly. Slice and serve warm.
Subscribe to:
Posts (Atom)