Saturday 31 March 2012

Bosnian Recipes


This month (March) I've been featuring food from Bosnia and making a selection of Bosnian recipes to share with you and learning a lot about Bosnian ingredients and cooking styles as I go! I've really enjoyed experimenting with all these new ideas and making some recipes which are nothing like I've ever made before! Overall though, I haven't made anything which I haven't really liked (which is a credit to Bosnian food - but also to my ability to be selective with the recipes I choose to cook and my habit of changing things as I go if I think they're going to be less-than-delicious!). The Bosnian recipes this month are scattered amongst my other recipes so I thought I would do a recap on the last day of the month to relive all the great Bosnian times I have had this month (and I'll tell you what I'll be featuring next month as well!).

~Savoury~

Vegan Zeljanica (Spinach & Cheese Pie)
Bosnia proved to be a very "Spinach and Cheese" kind of country (as you will note later as well!), so it gave me a lot of opportunities to experiment with home made vegan feta cheese. This recipe I used feta made from almond meal and baked in the oven - it was rich and luscious! Check out the recipe here.

Razljevak (Bosnian Cornbread)
Despite it's simplicity this was possibly my favourite of the savoury dishes I made for Bosnia! It made a gorgeously light and corn-filled bread with a wonderful crunch on the bottom of the loaf. I have made it again since and my partner keeps asking me to make it again! Check out the recipe here.

Prebranac (Bosnian Baked Beans!)
I've been wanting for a long time to try making my own baked beans - and now I have! Bosnian-style that is. These aren't really anything much like the ones you buy in tins but I think they are even better. The gorgeous smoky paprika adds a wonderful flavour and a sensational aroma to this simple dish. Check out the recipe here.

Spinach and "Cheese" Plait
Another spinach and cheese one - I told you there was more coming! This time I used my own home made vegan feta cheese with great results! Check out the recipe here!


Vegetable Cufte (kind of like veggie meatballs...)
This was one recipe which I have to admit I wasn't entirely convinced of the authenticity but who care about authenticity when it tastes this good? The combination of unusual flavours makes these smell and taste quite special indeed! Check out the recipe here!


~Sweet~

Easy Bosnian Chocolate Walnut Cake
This one was a bit of a gamble for me as I was really unsure about how it would turn out! But I was so glad I took the chance on it because it was amazing! This is probably my personal favourite from this collection of Bosnian recipes. It was rich, moist and slightly crunchy on the outside like a big heart shaped brownie! Check out the recipe here.
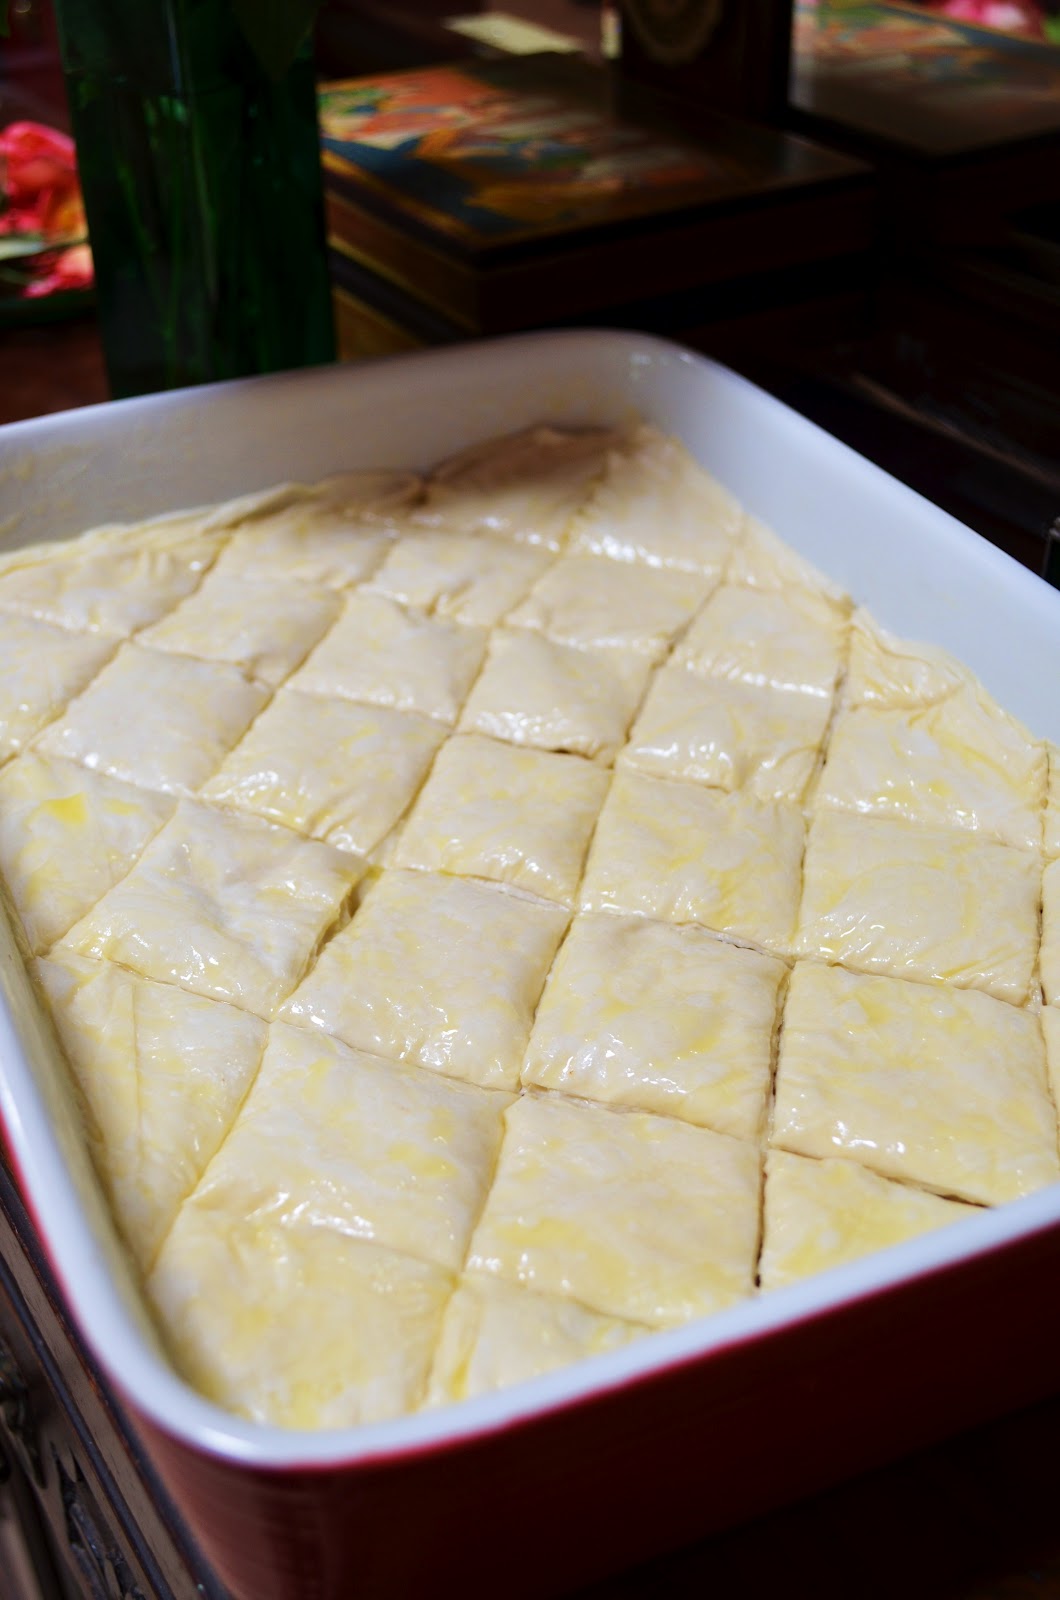
Walnut Baklava
This was a really delicious and simple baklava - although it makes a big baklava so I recommend inviting lots of friends over to help you eat it! Check out the recipe here.

Tufahija (Poached Apples stuffed with Walnuts)
These ones were spectacular! So delicious and the fact that it's an apple makes it feel almost healthy, except for all the syrup and the incredible fluffy whipped coconut cream. It's one of my favourites from the month. Check out the recipe here.


NEXT MONTH......
I'm really excited to announce that next month (April 2012) we will be featuring amazing Iranian inspired recipes! Watch this space for an amazing array of Persian Food! I love love love Persian food so I am incredibly excited!! Here is a sneak peak what you might be seeing:


Thursday 29 March 2012

Tufahija (Bosnian Walnut-stuffed Poached Apples) with Whipped Coconut Cream


This is the last recipe I will be posting for Bosnia Month, because March is almost over already! I have saved an absolute favourite of mine 'til last the end of the month as well. Bosnia has been so delicious in all aspects, but I have to confess, to me, this has been a dessert month. The Bosnian desserts were just amazing. However, my partner said he personally thought that the Bosnian savoury food was stronger this month and particularly nice - so I guess it's just all awesome :)

These incredible poached apples and the Easy Bosnian Chocolate Walnut Cake are my two favourites from this month. As you may have noticed, walnuts were really quite a theme here! All three of the Bosnian desserts I made this month were packed full of walnuts (see also my Bosnian Walnut Baklava)! So it seems that walnuts may just be the national nut :)

This dessert was so delicious and easy and is super convenient for dinner parties for 2 reasons. 1) you can just use exactly the right amount of apples so that there is one for each guest and you're not piled with a whole lot of leftovers (although not so good if you're not quite sure how many people are coming to your dinner party) and 2) it is mostly done in advance - the apples can been cooked and stuffed well ahead of time and then all you need to do is plate them up and add some whipped cream (coconut of course!).


One quick thing I should note is that for this recipe you will need an apple corer. I've never owned such an implement and have never desired to so I was calling around to all my friends to see if they had one that I could borrow. I was just starting to despair and thinking that I might have to actually buy an apple corer (which I'm sure I would never use ever again), when I discovered that actually my partner's mother has one! It had never even occurred to me to ask him because a) he lives with me and b) he's not much into cooking. Lesson learned - sometimes we forget to ask the most obvious people!

I made 9 apples when I cooked this for my dinner guests, so I doubled the recipe. Unfortunately, with the quantities listed I had quite a lot of leftover syrup. This is a difficult thing to avoid, since you need to have enough liquid in the pan to poach the apples. You can play around with the quantity of syrup depending on the depth and size of your saucepan, as long as you keep the sugar to water ratio at 1:2. You may also be able to reduce the amount of syrup by using a small, deep saucepan and poaching the apples in batches.

If you do have a lot of syrup left over, I used it up making these lovely Apple and Rhubarb Sago Parfaits and a great Apple Syrup Cake (recipe to be posted at some other stage).

Ingredients
4 green apples
2 cups raw sugar
3 cups water
Juice of a lemon
1/2 cup walnuts
2 tbsp raisins
1 can of coconut cream, chilled in the fridge over night (minimum! Optimum would be a few days.)
1 tbsp confectioners sugar (soft icing mixture)

To Make
1. Add the water, sugar and lemon juice to a large saucepan and heat gently until all the sugar has dissolved.
2. While this is heating peel and core your apples. Reserve the peelings to use later. As soon as they are peeled and cored bring the syrup to a low simmer and add the apples (do this fairly quickly, as if you leave the apples sitting around peeled for too long they will go brown).
3. Cover the saucepan and let simmer gently for about 4-5 minutes. The apples should be just soft enough to poke with a fork or knife, but still maintaining their shape. Remove from the syrup with a slotted spoon and place in a container to cool (I recommend doing this with the hole facing upwards to reduce risk of them collapsing as they cool). I actually put mine straight into a muffin baking tray to cool, as the muffin indents in the tray were just the right size and helped the apples keep their shape as the cooled.
4. Continue to simmer the syrup and add in the apple peelings that you reserved earlier. Simmer, uncovered, for about 30 minutes. The syrup should be reduced and thickened. Remove the apple peelings with a slotted spoon and set the syrup aside to cool.
5. While the syrup is simmering you can prep your filling. Roughly chop the walnuts and raisins and mix in a bowl. 
6. Once the apples are cooled stuff the holes in the centre with the walnut and raisin mixture. Do this in the container (muffin pan) that you had them cooling in, so as not to make a big mess on the final plate.
7. Just before serving make the whipped coconut cream: when you open the tin you will notice that the top is a very solid thick cream. Scoop out all of the solid thick cream on top (you can reserve the rest of it to use in another meal – like a curry). Put the cream into a bowl and mix well using a hand held electric mixer. Move the beaters up and down to get as much air into the cream as possible. Add the sugar and beat until it looks just like thick whipped cream.
8. To serve, place an apple on a small plate and drizzle with some syrup and dollop some cream on the side. If there is any leftover walnut filling sprinkle it on the top as garnish.

Serves 4.

Check out our other Bosnian recipes:

Tuesday 27 March 2012

Bosnian Walnut Baklava


I grew up eating and loving my mother's delicious Greek style walnut baklava. We loved it so much that we used to make it all the time until one day my mother just decided that she just couldn't be bothered hand chopping all those nuts any more and she hung up her pastry brush and never made it again. I still have such fond memories of baklava though!

Baklava to me always means walnuts, which is a big surprise to most of the people I meet because most of the time the only baklava Aussies eat is pistachio baklava bought from the local kebab shop. I have to confess - until I was about 16 I didn't even know that pistachio baklava existed. But when I was 16 I got a great Lebanese boyfriend who introduced me to pistachio baklava. I admit we had several good hearted arguments about which baklava was better!

Even though I generally prefer pistachios over walnuts, to me, walnut baklava has always had my heart! So when I found out that they eat walnut baklava in Bosnia my heart swelled with the idea of making it again!I bought piles of walnuts and steeled myself for a long time chopping, because one thing I have learnt from making baklava in the past is that you MUST chop the nuts very finely, don't be slack and leave them chunky because your baklava will fall to pieces when you try to serve it up! So I started to chop all my walnuts and then I realised that since I used to make baklava with my mother food processors had been invented! So much quicker!

What's your favourite type of baklava?


Ingredients
25 sheets filo pastry, thawed if frozen (should be about 1 box)
5 cups walnuts, ground coarsely
1/2 tsp ground nutmeg
3 cups sugar
2 cups water
Non dairy butter or margarine for brushing, melted

To Make:
1. Lay the filo pastry out ready to use and cover with a damp tea towel (not too damp though!).
2. Mix the ground walnuts and nutmeg together.
3. Brush the bottom of a large baking dish with melted butter and lay a sheet of filo over it. Fold in the edges so that it fits the dish. Brush the top with more melted butter. Repeat, doing 8-10 layers of filo.
4. Spread half of the walnut mix on the top of the pastry.
5. Cover the walnuts with another 5-6 layers of pastry and butter.
6. Spread the remaining walnuts over the top of that.
7. Layer another 8-10 layers of filo pastry over the top, neatening any edges as you go so that it doesn't spill over the top.
8. Brush the top with plenty of melted butter. Cut the top diagonally into diamond shaped slices, cutting just through the top layers of pastry. Like this:


9. Bake in a moderate oven for 40 minutes, or until golden brown on the top.
10. While it is baking you can prepare the syrup. Put the water and sugar in a saucepan over a low heat, stirring frequently, until all the sugar is dissolved.
11. When the baklava is cooked remove from the oven. Whilst the syrup and the baklava are still hot pour the syrup over the top, covering evenly. Allow to cool.
12. Chill in the fridge over night (or for at least 3-4 hours).

Makes about 30 pieces of baklava.

Check out our other Bosnian recipes:

Monday 26 March 2012

The Vegan Soup-off Blog Hop Announcement


Soup!!! What is more comforting or satisfying on a chilly day than soup? I've been participating in a lot of delicious blog hops lately, so I thought I would give back a little and host one of my own. I've decided to choose the subject I am most passionate about: Soup! Here in Australia it's just starting to turn Autumnal - so the perfect soup weather! However, I am aware that most of my readers are from the USA so I figured I would get this in while it is still Spring for you guys and probably hasn't warmed up too much (although I am a firm believer in eating soup all year round!).


Here is the challenge: share with us your favourite soup recipe or an exciting new soup recipe of your own creation. 

Now, you will notice from the title that it is a vegan hop. Don't be scared by this! I encourage all non vegans to enter and to embrace lovely vegan soups! Soups are not a difficult vegan challenge (even for those frightened by vegan food!) because there are so many delicious vegetable, grain and pulse soups out there! To clarify for any non vegans out there: a vegan soup must be free of: meat (this includes meat based stocks), milk, cream, eggs, cheese, butter and honey. Everything else is good to go!

I hope you will take this opportunity to explore a bit of vegan cooking and to come up with something new and unique! If you are a bit lost for ideas you can draw some inspiration from some of the past soups I have posted by clicking here.

I'll give you three whole weeks to think about it so the blog hop will open at 9am on Saturday 14th April (AEST). I will accept entries for the whole week so the hop will close midnight on Friday 20th April (AEST).

The Rules:
1. Entries must be soup.
2. Entries must be vegan.
3. Entry posts must have a link back to this post so that others can find this hop and participate.
4. Entries can be posted from any time, they do not have to have been posted in the week of the hop.
5. Entries must include the recipe, not just a picture of something you made.
6. Entries that do no meet the above criteria will not be added to the hop.
7. More than one entry per blog is accepted, however, a maximum of two per blog.
8. Check back to this blog on 14th April for instructions on linking your entry to the hop.

Please send this to any food bloggers you know to increase the amount of delicious entries and tweet about the hop using the #soupoff tag.

It's all about sharing and caring of course so there will be no winners or losers :) However, I will pick the soup that I think is the most new and exciting and re blog it with a link back to your original recipe.

I should also note that this is my first blog hop so I'm still feeling my way around it so bear with me! I really can't wait to see what wonderful recipes will be shared!

Happy Souping!

Saturday 24 March 2012

Vegetarian Cufte (kind of like veggie meatballs...)


I'll be very honest about this one! I found this recipe on the internet when I was researching Bosnian food and I have some reservations about it's authenticity as traditional Bosnian cuisine. It has several ingredients in it that I wouldn't even remotely associate with Bosnia - tofu, mustard, soy sauce and sesame oil?? But - I'm no Bosnian so I'm not really in a position to comment on it's authenticity (maybe a Bosnian reader could help me out with this one?).

Bosnian or not, I really wanted to try these because the combination of flavours sounded so intriguing! Toasted almonds, dijon mustard, sesame oil, fennel seeds, cayenne pepper, caraway seeds and basil seemed like the most exotic combination of flavours which I would never have dreamed of mixing all together in the one ball!


Initially I was pondering whether or not to post this one up for a few reasons: 1) because I wasn't sure if they really were very Bosnian!, 2) because they didn't really photograph well and 3) because it wasn't really my own recipe (and I like to post up only original recipes where possible!). In the end though these three reasons fell at the feet of the fact that these Cufte were delicious! In the end this blog is really about sharing great flavours and recipes with everyone and not really about competition-winning photography or authentic world cuisine. It's about sharing new experiences and new dishes with people because of how they taste not because of how they look or where they came from! I'm also blogging it for my friend Paul who helped me make them because I'm pretty sure he is dying to make them again and needs the recipe :)

One thing you really must appreciate when you cook these is the smell that you are subject to while they're baking! The sesame oil and spices in this give off the most delicious aroma. Paul and I kept hovering around the oven and opening the door a crack to breathe in the goodness - kind of like some sort of scent addicts. But it doesn't stop at the aroma - because of the complex flavour combinations these babies have a beginning, a middle and an end like all good stories (and food). First, you taste the sesame oil and soy sauce, then suddenly the middle hits you and it tastes like herbs and spices - the basil, the fennel and the caraway with a hint of toasted almond. Finally, just when you think you have experienced it all you suddenly realise you mouth is tingling with the cayenne pepper!

Ingredients 
2 onions, finely diced
4 cloves garlic, minced
3 tbsp vegetable oil
3 carrots, grated
4 tbsp arrowroot powder
2/3 cup cold water
2 cups breadcrumbs
1 cup almonds, toasted lightly in a dry frying pan for a few minutes
2 tbsp dijon mustard
1 tbsp toasted sesame oil
1/4 cup soy sauce
1 tsp fennel seeds, ground in a mortar and pestle or spice grinder
1/4 tsp cayenne pepper
1/2 tsp caraway seeds, ground in a mortar and pestle or spice grinder
3 tbsp fresh basil (or 1 tbsp dried basil)
1/4 cup fresh parsley
1 tsp dried Italian herb mix
1/2 tsp black pepper
salt to taste
900g hard tofu (this means that it should be very solid and should keep it shape when you squeeze it)

To Make:
1. Preheat your oven to 180 degrees.
2. Heat the oil in a large fry pan and sauté the onions and garlic until golden. Add the carrots and cook for about 5 minutes, or until carrots are softened and cooked.
3.. Dissolve the arrowroot in the cold water and stir well until the mixture is completely smooth and watery.
4. Grind the toasted almonds finely in a food processor (or substitute ground almonds but they won't have the same toasted quality).
5. Squeeze any liquid you can out of the tofu and crumble finely into a very big mixing bowl. Add sautéed veggies, dissolved arrowroot and all remaining ingredients to the bowl. Mix well - the best way to do this is to just get your hands right into it.
6. Line a tray with baking paper and roll the mix into large balls (about the size of a billiard ball). This mix should make about 32. Alternately, get some spunky guy that appears in your kitchen to do it:

7. Spray lightly with olive oil and bake in the oven for 10 minutes (you may want to turn them around about half way to ensure even cooking).

Makes 32 cufte.


Check out our other Bosnian recipes:

Thursday 22 March 2012

Bosnian Spinach and "Cheese" Plait


Simple and spectacular! Nothing says "I'm a culinary whizz" like a plaited pastry (either that or you're a smug wanker who thinks too highly of herself, K-bobo). Either way you are in for a tasty treat here and one that will super impress any guests you happen to have lying around. As I've commented previously (in this post on the subject), Bosnia turned out to be a real Spinach-and-Cheese kind of country - which provides an interesting challenge for a vegan cook. I sure had fun with it though! 


This is my second spinach and cheese pie recipe, in my first recipe I used a vegan home made baked almond feta which I found on another blog (see here). Overall, however, I found that cheese a bit heavy and creamy (and also VERY expensive to make - being made almost exclusively of almond meal). So this time I used my own home made feta which I devised for Croatia Month (January 2012) when I made my Croatian Pizzas. It made a much lighter filling, which was appropriate for this delicate little plait! The plait formation also makes it very easy to serve, just cut it up across the plaiting and each piece you cut will magically already be in three individual pieces - making it quick and easy to serve up at a dinner party. You will need a helping pair of hands to roll these up and plait them though!


Ingredients
6 sheets filo pastry (thawed if frozen)
1 small bunch spinach (silverbeet)
300g hard tofu (meaning it should be a solid blog which retains it's shape when you squeeze it)
Juice of 1/2 lemon
2 clove garlic
1 tsp salt
1/3 cup almonds, toasted (you can do this in the oven for a few minutes or in a dry fry pan)
1/3 cup walnuts
Pinch of nutmeg (optional)
Melted Nuttelex (or other non dairy butter or margarine)
Sesame seeds

To Make
1. Chop the spinach and place in a saucepan with 1/2 cup of water. Cover and let it cook on a medium heat until the spinach is completely wilted (about 10 mins). Drain the spinach and squeeze out all the water. Allow to cool.
2. Crumble the tofu with your hands into a bowl. Crush the garlic into the bowl and mix well. Add the salt and lemon juice and stir through. Taste test and see if it needs more salt or it needs a bit more sour (if so add a bit more lemon juice). Set aside for about 15 minutes to allow the flavours to infuse into the tofu.
3. Pulse the walnuts and almonds in a food process until coarsely ground, add a pinch on nutmeg.
4. Combine the cooled spinach, nuts and the tofu mixture in a bowl and mix well (easiest to do with your hands).
5. Lay you sheets of filo pastry out on the bench and cover with a slightly damp tea towel when not using. Melt the butter for brushing the sheets with.
6. Take 2 pieces of filo pastry and lay them on top of each other. Along the longest edge of the pastry spread out 1/3 of the spinach and tofu mixture:


7. Starting from the edge with the filling, roll the pastry up like a loooong cigar or sausage roll, use melted Nuttelex on the last inch or two of the pastry to make it stick and hold it together.
8. Repeat with the rest of the ingredients. You should now have three identical logs. 
9. Line a baking tray with non stick paper and place the three logs onto it. Brush each log with melted Nuttelex to make them easier to plait. Pinch them together at the top and space make plenty of space between each log to allow some room for the plaiting:


10. Starting from the log on the right hand side carefully plait the logs until you reach the end, it should only be a few plaits but try and keep them nice and tight. Pinch the other end together as well to keep it together.


11. Brush with a bit more Nuttelex and sprinkle with sesame seeds. Bake in a moderate oven for 20-25 minutes, until browned on top and the pastry is nice and crispy. Serve immediately!

Serves 4-5.

Tuesday 20 March 2012

Prebranac (Bosnian Baked Beans)


I'm not a big fan of tinned baked beans, I don't mind them but I tend to find them a bit on the mushy side and I'm always shocked to see just how many of them have cheese in them (mmmm tinned cheese... ). However, I have often though about making my own tasty and less overcooked version but I've never got my hands on the haricot beans to do it. This is the closest I have ever come - although to be honest they aren't completely baked as such... they're more boiled and then baked. But why are we splitting hairs when we should be eating beans?

This is a pretty common dish on the internet under Bosnian recipes. It is very simple and relatively effort free to make - all you need to have is a bit of time to let the beans cook. One thing I should note is that this makes a HUGE amount of beans!! Originally I thought I would halve the recipe before I posted it online because I had sooooo much leftover! However, I decided instead to post it as it is because I found that I loved having these great tasty generic beans in the fridge and I used them in everything! Not joking, here is a few examples (note: these photos aren't my best - I just snapped them quickly before eating my lunch!):

Stir through your pasta!
Add to your salads
Into your minestrone or any other soups!
Seriously, you can use a couple of cups of these in any thing that you might use a tin of beans for! They're more flavoursome, less mushy and have a bonus of not having been stored in a tin can for goodness knows how long! They are also delicious as just beans on toast, but I didn't get a picture of that. So - if you want wonderful beans in the fridge for ages to add to everything then make the recipe in full. If you just want enough to feed about 4-5 people then halve it and if you really only want it for one meal for two people then you had probably better quarter it.

Ingredients
700g small white beans of your choice (I used Great Northern Beans), soaked for 24 hours
6-7 onions, sliced
2 carrots, sliced
1 tsp salt
3 bay leaves
1 tbsp oil for frying
3 heaped tsp sweet paprika
1 heaped tsp smoky paprika
3 tbsp tomato paste
Pepper to taste

To Make
1. Fill a large pot with cold water and add the beans. Bring to the boil and boil for 10 minutes. Drain the water and replace with hot water.
2. Add the salt and bay leaves to the beans and hot water. Cover and simmer on a medium heat for about 40 minutes, or until the beans are almost cooked.
3. Add the carrots and simmer for another 10 minutes. The beans should now be soft and the skins split.
4. Drain and set the beans and liquids aside separately (you can leave the bay leaves with the beans).
5. Heat the oil in a large fry pan and fry all the onion until transparent and starting to brown. Add the paprika and fry for a further minute.
6. Take a big baking dish and add the beans and onions to it. Take 2 cups of the hot broth that you set aside before and dissolve the tomato paste into it. Add it to the baking dish along with another 2 cups of the broth and stir everything well.
7. Cover and bake in a moderate oven for 20 minutes. Then remove the lid and bake for another 10-15 minutes, or until it starts to look browned on the top.


Best served with delicious Bosnian Razlevjak (Cornbread)!


Monday 19 March 2012

Rhubarb and Apple Sago Parfait


When the Sweet Adventures Blog Hop Hosts announced their next theme to be "Layer upon Layer" I was a bit at a loss. There are lots of things that immediately spring to mind - layer cake, baklava, slice, trifle etc. None of these things really excited me though, plus I really wanted to make something healthy and not too heavy! I have to admit that sometimes I find these blog hops a bit difficult because I just wish I could cook something savoury instead! I eventually decided a fruit parfait would be a healthier option than any other that I could think of - however, I was still faced with the layers of cream all through it. Then it hit me like a cream pie in the face - sago!

I love sago. Love love love it! It is the perfect alternative to cream and to custard (as you can see in my Vegan Strawberry Cherry Sago Trifle!) On a recent trip to my favourite Asian supermarket I found the most amazing thing..... green sago!! Green sago (thought I should say it again for emphasis!). As far as I can see it really is just sago with some food colouring because the ingredients just say 'sago'.... so evidently it is just sago. But check it out!!!!!


So once I had decided on sago parfait I knew that I just had to use my new green sago. I decided to combine it with the rhubarb that was growing abundantly in my garden and what better partner to go with rhubarb than apple? Rhubarb and apple are quite a classic combination - however combining them with sago?? Well it was amazing! The fruity sago layers are creamy yet refreshing, and the whole parfait is an amazing mixture of textures! Stringy, pulpy rhubarb and firm sweet apple pieces combined with the amazing creamy pearls of sago and then a beautiful surprise at the bottom in the form of crunchy, syrupy walnuts!!


Ingredients


Sago Custard:
1 can coconut milk
2 1/2 cups water
1/2 cup sago (tapioca pearls)
1/3 cup sugar
1 cinnamon stick
1/2 vanilla bean, sliced open

Fruit:
1 cup water
2/3 cup sugar
Juice of 1/2 lemon
1 green apple

1/3 cup water
3 cups rhubarb, chopped into 1cm pieces
1/3 cup walnuts

To Make:
1. Heat the coconut milk, water and sugar in a saucepan until sugar is dissolved. Bring to a gentle simmer and add the cinnamon stick, vanilla bean and sago. Stir while bringing to a simmer. Simmer, covered over a low heat for 30 minutes, stirring frequently. Remove the cinnamon stick and vanilla bean and allow to cool.
2. Heat the other cup of water in another saucepan and add the sugar. Leave on a low heat until all the sugar has dissolved. Add the lemon juice.
3. Peel the apple and set the peel aside (you'll use it later!). Cut the apple into quarters, remove the core and slice the apple into slices about 1/2 centimetre thick. Add the apple to the saucepan and simmer, covered, for 4-5 minutes. The apple slices should be just tender but not mushy! Remove the apple slices and set aside.
4. Add the apple peel to the saucepan and leave the syrup on a low heat to simmer, uncovered, for 15 minutes. After 15 minutes turn off the heat and remove the apple peel. Allow to cool.
5. In another saucepan combine the 1/3 cup water and the rhubarb. Cover and simmer for 10 minutes. Remove lid and simmer gently for another 5 minutes, there should be little or no water left. Mash the rhubarb with a fork until you have a lovely mushy rhubarb pulp. Add 2 tbsp of the hot syrup that you have simmer in the other saucepan (I'm assuming you are cooking all of these elements at the same time, I did!!). Remove from the heat and allow to cool.
6. Allow the sago, apples, syrup and rhubarb to cool to room temperature before assembling (don't refrigerate - all the elements will congeal and you will find it hard to layer it!).
7. Take 4 wide short tumblers (like scotch glasses) or small glass bowls. You could also use wine glasses or Martini glasses. Place a few slices of apple on the bottom of each glass and then layer 1/4 of the walnuts into each one - breaking them up into smaller pieces as you do. Spoon 2 tbsp of the syrup (which has cooled to a lovely thick honey like consistency) over the walnuts. This will be the lovely syrupy walnuty surprise at the bottom!
8. Layer the rest of the ingredients into the glass/bowl in this order: sago, rhubarb, apple, sago and then a spoonful of rhubarb on top. Chill for at least an hour in the fridge before serving. Enjoy!

Makes 4 individual parfaits (will vary depending on the size of your tumblers/bowls).


This is part of the March Sweet Adventures Blog Hop. Check out all the other layered desserts in the hop by hitting up all those little tiny pictures you see here:

Tuesday 13 March 2012

Easy Bosnian Chocolate Walnut Cake


This cake is completely different to any other vegan cake I have ever made! To be honest this made me pretty nervous. I have already got a pretty amazing basic recipe which I base all my vegan cakes and cupcakes on. It makes a light, fluffy and flavourful cake which always makes me happy and wows everybody I bake cake for. So, I was reluctant to try a completely different cake when I'm so happy with the cake I've got now. It's kind of like working hard at the gym and finally getting the awesome fit body you want and then somebody (presumably some sort of magician/witch/genie/gypsy/robot devil) offers you the chance to have a completely new body instead - but you don't know whether it will be worse or better (that is possibly a bit of an extreme parallel to draw - but that just tells you how passionate I am about my perfect cake). Do you take it???

So - last Saturday afternoon I met up with a wonderful friend and decided that I had to get over my nerves and bake this cake. It is based on a cake which I found on several different websites called the "Bosnian Easy Cake". At first glance I couldn't see much about this cake which made it special or particularly Bosnian (perhaps a Bosnian reader can tell me this!!), but it was conveniently vegan! So I decided to make my own version - adding real dark chocolate to make it rich and adding walnuts (because it seems like all the Bosnian desserts I have found are full of walnuts!!).

When we mixed the cake batter together we were worried. Understatement. The batter was dense, thick, oily and heavy. I was having people over to dinner to help me eat this cake so I had a mild panic attack (which mostly consisted of me hopping from one foot to the other and saying "What should I do? What should I do???") and wondered whether I should try and alter the recipe or whether I should trust it and see what happened.

When we pulled it out of the oven and I saw the beautiful dense brownie-like cake I actually jumped from one foot to the other with joy!! It had cooked through! It looked like a cake!! It wasn't a big blob of sticky dough!! My relief was phenomenal. Not only had it worked..... it looked delicious!! It smelt like rich chocolate and baked walnuts, it felt firm and dense under my touch (so different from the light fluffy cakes I usually cook!) with a crunch hard top like a moist brownie! It tasted rich, chocolatey and fudgey with crunchy chunks of walnuts littered through it like hidden treasure. I'm so glad I took the chance and found something new which I will definitely be making again!


Bosnian Chocolate Walnut Cake


Ingredients
2 cups plus 2 tbsp wholemeal flour
1 cup raw sugar
1/2 cup cocoa powder
1 tsp baking powder
1 cup water
1 cup oil
100g dark chocolate
1 cup walnuts, roughly chopped

To Make
1. Preheat your oven to 180 degrees.
2. Mix all the dry ingredients together in a bowl except the walnuts.
3. Make a well in the middle of the dry ingredients and add the wet ingredients except the chocolate. Mix well with a wooden spoon (or maybe you electric mixer - but it is a very thick mix so depends how good your mixer is, I've always been a bit old fashioned and like mixing my cake mixes by hand).
4. Melt the chocolate in a double boiler (if you are already a pro at melting chocolate properly then skip ahead now to step 5). If you don't have a double boiler (who does?) then bring a small amount of water to the boil in a saucepan and balance a ceramic or metal mixing bowl over the top of the saucepan. Chop up the chocolate roughly and add it to the bowl. Stir continuously until the chocolate is almost completely melted. Remove from the heat and continue to stir until the chocolate is completely melted and smooth.
5. Mix the melted chocolate and the walnuts into the cake batter.
6. Grease a medium sized cake tin well (as you can see I used a cute heart shaped one) and line the bottom of the tin with greaseproof paper (I found that it didn't tend to stick to the pan much at all so you needn't be anxious over it).
7. Pour the cake batter into the prepared tin and bake for 40 minutes. Test the cake after 40 minutes by inserting a sharp  knife into the centre of the cake. If it comes out clean the cake is done, if it comes out dirty give it another 5 minutes in the oven.
8. Turn the cake out to cool. When cooled dust with icing sugar and serve.


Sunday 11 March 2012

Vegan Razljevak (Bosnian-style Cornbread)


This cornbread is nothing short of perfect. The first sense you get of it is the tantalising aroma of baking corn, like some kind of rustic magic is happening. Then, when you take it out of the oven and test it you'll notice how perfectly springy is feels under your touch, yet firm and full of corn! Cornbreads have three possible drastic possibilities: too dry and heavy, too thick and soggy or light and fluffy just like bread but with no cornmeal in sight. This bread is none of these things. It rose slightly, but not too much. The crust was beautifully crusty but the inside was light and fluffy and perfect with any soup, stew, beans, casserole or chilli. If you want a taller loaf just double the recipe.


Ingredients
1 1/2 cups soymilk
1 tsp apple cider vinegar
3/4 cup wholemeal flour
1/2 cup cornmeal (polenta) plus 1 tbsp
1/2 cup semolina
2 tsp baking powder
1 tsp salt
1/3 cup apple sauce
1/3 cup vegetable oil

To Make:
1. Preheat the oven to 180 degrees C.
2. Whisk the soy milk and vinegar together and set aside to curdle sightly.
3. Grease a loaf pan with non dairy butter or margarine and sprinkle 1 tbsp cornmeal evenly over the bottom of the dish.
4. Sift all the dry ingredients together in a bowl and mix well to combine. Add the rest of the ingredient and mix to combine. The batter should be quite thin and pourable.
5. Pour into the loaf tin and bake for 20 minutes, or until a knife comes out clean when inserted into the centre of the loaf.
6. Turn out of the tin and allow to cool slightly. Slice and serve warm.