Friday, 17 May 2013

Fugazza (Argentinian Caramelised Onion Focaccia)


This month I'm cooking and sharing lots of Argentinian food, and I've learn't a lot about it so far! I was surprised how often pasta, gnocchi and focaccia came up in my research and in talking with Argentinian friends. Italian in Argentina? Apparently so! There is quite a strong Italian influence in Argentina which lead to some delicious fusion and the prominence of some classic Italian dishes (you'll be seeing a couple from me this month!). 

I love focaccia so I couldn't pass up the chance to make this one. Whilst the Italian varieties tend to be topped with olives and herbs (or sometimes sundried tomatoes), the Argentinian version is generally topped with onions and dried oregano. It's called Fugazza - and it's delicious. You can either top with raw chopped onion (it'll cook up as you bake the focaccia) or you can make it even tastier by slightly caramelising the onions first. Guess which option I picked? Caramelised onions every time.


Ingredients
1 cup warm water
2 tsp yeast
2 tsp sugar
2 2/3 cup plain flour
1 tsp salt
8 tbsp olive oil, divided
2 onions, peeled and sliced
1 tbsp brown sugar
1 tbsp white wine vinegar
3 tbsp dried oregano

To Make
1. Combine the warm water, sugar and yeast in a bowl and set aside for 5-10 minutes, until the mixture is frothy on top.
2. Combine the flour and salt in a mixing bowl. Add 5 tbsp olive oil and the yeast mixture and mix to form a dough. It should be soft and pliable, but not sticking to your fingers. If it's too wet add a bit more flour, if it's too dry to hold together add a little more water.
3. Turn the dough out onto a floured benchspace and knead for 10 minutes (set your oven timer and put on some good music to sing along to).
4. Lightly oil the mixing bowl and return the ball of dough to it. Cover with cling wrap or a tea towel and leave in a warm place to rise for 45 minutes (or until doubled in size). In the meantime you can preheat your oven to 180 degrees.
5. Once risen turn the dough out and punch down into a smooth ball. Oil a round pan with 2 tbsp olive oil and place your ball of dough in the centre. Gently flatten the ball out into a disc with your fingers. You'll get to a point where you can't stretch it any further without it springing back. When you get to this stage just set is aside and let it rest for 10 minutes (while it's resting you can chop up your onions).
6. After 10 minutes the dough should have relaxed, allowing you to spread it out further. Keep doing this until the dough covers the whole pan and reaches the edges (you may have to rest it again before you can get it the full diameter).
7. Heat 1 tbsp olive oil in a fry pan and saute the onions until softened. Add the sugar and vinegar and cook for about 5 minutes.
8. Spread the onions over the the base and sprinkle liberally with dried oregano and a drizzle of olive oil.
9. Bake for 15 minutes, or until the edges become golden brown. Remove from the oven, slice and serve up.


This month I'm featuring lots of recipes from Argentina!

Check out my other Argentinian recipe posts:


Wednesday, 15 May 2013

Blackberry & Almond Braid


Making bread is so many things. Therapeutic, impressive, aromatic, calming. Also very, very rewarding in a delicious way. I hope you're enjoying 2013, and that you take a bit of time out to relax, read a book and bake some bread. Maybe even this bread - a sweet bread perfect for breakfast, morning tea, afternoon tea or dessert.

Blackberry & Almond Braid

Ingredients
1/4 cup soy milk, slightly warmed
2 tsp instant yeast
1/4 cup sugar
3 cups plain flour
1/4 tsp salt
3/4 cup (180ml) coconut milk
3/4 cup blackberry jam
1 cup almonds, roughly chopped
Extra soy milk for brushing

To Make
1. In a large mixing bowl combine the warm soy milk, yeast and sugar and whisk together. Set aside for 10 minutes until the top gets frothy.
2. Add the flour, salt and coconut milk to the yeast mixture and mix to form a dough. Turn out onto a floured surface and knead it until it's smooth and elastic, which should take no less than 5 minutes, and as much as 10 minutes.
3. Return to the bowl and and cover with cling wrap or a tea towel. Leave in a warm spot to rise for 90 minutes. 
4. Preheat the oven to 170 degrees. Divide dough into three equal pieces and place on a floured benchtop. Roll each piece in a long thin strip about 45 cm long and about 6 cm wide (don't get a ruler out, just make them all long and thin and about the same length!).


5. Spread 1/4 cup jam and 1/3 cup chopped almonds along each piece, leaving about 2cm around the edge.


6. Fold the edges in on all three pieces and transfer to a large baking tray lines with greaseproof paper. Pinch them together at one end and braid the strands as tightly as you can (you're probably going to benefit from an extra pair of hands for this). Twist the strands a bit as you plait, to make the jam even more marbled through the bread.
7. Brush the top with soymilk and bake for 40 minutes, or until golden brown on top and cooked through. The jam may spill out the sides a bit, don't worry.
8. Cool to room temperature and slice.


Makes 1 large loaf.


Saturday, 11 May 2013

Turkish Delight Martini


I'm participating again in one of my absolute favourite blogging events - the Vegan Virtual Potluck. I almost didn't make it in this year, as I've been flat out and almost didn't get time to make my drink. So much travel planning to do! I'm heading overseas in July for almost 6 weeks so I have so much to organise and think about! I'm also looking for guest posts to help keep my blog from dying while I'm away - so if you are a blogger and you enjoy my blog, please think about contributing a guest post (I'll be happy to return the favour). Get in touch with me if you're interested. Enough about that - now to the cocktail!


In last year's potluck I brought a dessert - my Choc Banana Ice Cream Pie (Vegan & Sugar Free!). This time I thought I'd change it up a bit and bring a beverage, so that I could try out a new cocktail on you all. It's called a Turkish Delight Martini, even though it doesn't actually contain any of the ingredients of a martini. But let's not let nitty gritty get in the way of a good cocktail name. 


Turkish Delight Martini

Ingredients
3 measures vodka
2 measures Frangelico
2 tsp rosewater
2 drops pink food colouring (optional, just for colour)
1 cup ice
Pieces of Turkish Delight

To Make
1. Combine vodka, frangelico, rosewater and ice in a cocktail shaker. Shake and strain into martini glasses.
2. Place a small piece of Turkish Delight in the bottom of each glass. Enjoy!

Makes 2.

Variation:
You'll notice that this cocktail is just straight booze. Don't worry it tastes incredibly sweet and smooth. If, however, you'd like to thin out the booze a bit you can replace one of the measures of vodka with 2 measures of simple syrup.

This is the virtual vegan potluck, which is so much fun so make sure you check out everyone else's posts too!

To start from the beginning and work your way through head to the very first blog in the chain by clicking right....... here. If you've already worked your way through all the recipes before me then I hope you're enjoying all the dishes. I can't wait to sit down with a cup of tea and go through them all!

What's next in beverages? Time to move on to the next Potluck Offering. 


Hit this button to go to the previous post (Walnut Date Smoothies by Gazing in) or click here:


Hit this button to go to the next post (Citrus Glow Smoothie by Almost Raw Vegan) or click here:


Thursday, 9 May 2013

Vegan Dulce de Leche


Happy May everyone! You know how I always say that I'll be more organised this month with my posts? Well, once again I haven't. It's 9 days into May and I'm yet to post anything. Oops! Not only that, but I have a couple of leftover Dutch recipes to post from last month! Oops.

But I'm going to turn around and change that now! I'm starting with this - Dulce de Leche. Can you guess which country I'm featuring this month? I don't know if you guessed Argentina, but if you did then you're absolutely right!

I'm so excited that I've finally got a chance to head over to South America! I've had lots of different continents requested, but this is the first from South America and I'm very excited to get my teeth stuck into it! Although, if my initial reading is right, the Argentinians seem to love their sweets so that may not be so good for my teeth.

I'm starting with a fundamental - Dulce de Leche, but vegan. This had to be my first step because I'm going to be using it in several of my other recipes this month. Also because I've just always wanted to try it! This delicious vegan version is very easy to make, using coconut cream instead of condensed milk.

Vegan Dulce de Leche

Ingredients
2 x 400ml cans coconut cream
1 1/2 cups brown sugar
1 tsp treacle (just for richness & colour, you can leave it out if you like)
1/2 tsp salt

To Make
1. Pour the coconut cream (including any solidified bits) into a saucepan and add the brown sugar.
2. Heat over a medium heat until the sugar is dissolved and any lumps in the coconut cream have melted.
3. Add the treacle, and simmer on a medium heat with the lid off for 30 minutes.
4. Remove from the heat and stir in the salt.
5. Pour into clean glass jar(s) and set aside to allow to cool. Cool it at room temperature, rather than in the fridge. Putting it in the fridge will make your coconut cream start to solidify and you'll get lumpy dulce de leche.

Makes 2 medium jars (this really varies depending on the size of your jars).
Store at room temperature. Use however you like!

Here are some dishes I've made using my home made dulce de leche:
Alfajores
Dulce de Leche Tiramisu
Apple & Caramel Sago Pots


Check out my beautiful Alfajores - Argentinian Shortbread Biscuits filled with creamy Dulce de Leche:


This month I'm featuring lots of recipes from Argentina!
Check out my other Argentinian recipe posts:

Tuesday, 30 April 2013

The Netherlands Month (Vegan Dutch Recipes)


The end of Dutch food month falls fortuitously on a very important day in Dutch history! Today is Queen's Day, a day in which folk celebrate their monarchy by eating lots of orange foods. But this isn't just any Queen's Day - today Queen Beatrix will abdicate her throne and her son Willem-Alexander will become king. He'll be the first male monarch on the Dutch throne for something like a decade. So lets all celebrate with some Dutch delights (even if none of them are orange).

I didn't get around to doing much posting in April - I turned out to be quite busy, and actually I enjoyed spending less time on my computer. So I only have five Dutch posts up. I have another two waiting on my computer to share though, so keep your eye out and I'll post them up later. In the mean time here are the Dutch dishes I enjoyed this month!

Ingredients of the month: nutmeg, cinnamon and almonds.


~Savoury~

Naakte Kindertjes in Het Gras
This simple and sophisticated dish won my heart over with it's fabulous name - it's called Naked Babies in the Grass! It's a great option for a side dish or a pot luck as it complements almost any meal perfectly. Check out the recipe here.

~Sweet~

Luilakbollen
 Continuing the trend of awesome names is these Lazybones Buns. Yes, there is a story behind the name so check out the post to learn more. They're a bit like a cross between a fruit scone and a hot cross bun, and they make for a pretty special breakfast - so why not break these out for mother's day? Check out the recipe here.

Speculaas
Dutch month just wouldn't have been right without Speculaas, they're so iconic and so delicious! These little spice biscuits went down a treat and were very easy to make. Unfortunately I didn't have a spekulaasplank so I just cut mine into cute shapes and decorated them with almonds. I even made little cats with whiskers and everything - you know you want to check that out! Check out the recipe here.

Hollandse Stroopkoek
I can never resist trying a dessert or a baked good that has beer in it! So this beer and syrup cake went immediately onto my list of things to try. It was quite spectacular, even though it looks so innocent and plain! The beer lent a fantastic depth of flavour to the cake (but don't worry, if you don't like the taste of beer you will still love this cake!). Check out the recipe here.

Gevulde Speculaas
This could very well be the best sweet pie I have ever made in my life. Maybe even the best pie I have ever made in my life. It's pastry is made from delicate spiced Speculaas dough and it's filled with luscious almonds. You really can't not love this pie! It's a tough choice, but this is my favourite of the month! Check out the recipe here.


That's it for now! I'll post those other two recipes later on and then add them into this post, so stay tuned for some more Dutch recipes. Hopefully next month I'll be more on top of the posting!

In the meantime it's time to move on to a new part of the world! I'm excited to say that someone has finally requested a South American country! So get ready to explore the {vegan} cuisine of ARGENTINA in May!

Sunday, 28 April 2013

Gevulde Speculaas (Dutch Spiced Almond Pie)


This pie is one of the best things I've cooked all year - I can't recommend it enough! It's a great idea, the pastry is made from delicious spiced Speculaas dough and it's filled with gorgeous almonds. There isn't much else to say - just go and make it and you won't be sorry!

I've adapted this from a recipe on a great blog called The Dutch Table, which has loads of Dutch recipes. It's also run by a very nice person called Nicole who was more than helpful in advising me on my Dutch food month. It's so lovely to meet new and friendly people all over the world. Of course, being me - I have changed it up a bit to suit my personal taste! I just can't help myself.


Gevulde Speculaas
Adapted from The Dutch Table

Ingredients 
1 batch of Speculaas Dough (note: preferably needs to be made the night before)
1 cup blanched almonds
1 cup confectioners/icing sugar
1/3 cup water
1 pinch cinnamon

To Make
1. Hop over to this recipe and make the Speculaas dough the night before and leave it in the fridge overnight.
2. Preheat the oven to 170 degrees. Soak the blanched almonds in hot water for fifteen minutes.
3. Drain the almonds and set aside some for decorating (between 10-14 should do it). Place the remaining in a food processor and process until coarsely chopped, should only take a few pulses.
4. Tip the chopped almonds into a bowl and stir through the sugar, cinnamon and water.
5. Take the dough out of the fridge and cut in in half. Place on a floured bench space. Dust your rolling pin with flour and roll out half of the dough to a circle which will fit across the bottom of your pie dish (use a medium to large size shallow pie dish - preferably with a removable bottom!).
6. Transfer the rolled out pastry to the bottom of the dish. It might break up a bit as you move it, but just patch it up but pressing more dough into it (doesn't have to be neat, nobody will see it).
7. Spread the almond filling on top of the pie base. Roll out the top and place it on the top of the pie. Use any remaining pastry to decorate the top and press the almonds you set aside into the top.
8. Bake for 25-30 minutes, or until golden and cooked on top.


This month I'm featuring lots of delicious food from The Netherlands.
Check out my other Dutch recipe posts:


Saturday, 27 April 2013

Hollandse Stroopkoek (Dutch Beer & Syrup Cake)


Another sweet treat from the orange land of The Netherlands! This one looks pretty innocent and plain. It looks just like a normal fruitcake. But it's more. It's so much more. It has quite a delicate texture, which is unusual for a fruitcake, and the flavours of the two main ingredients really contribute to a cake unlike any I've ever had before.

If you're thinking, 'I don't like beer that much', then don't let the beer put you off this cake. I'm not a big fan of drinking beer either. Yes, you can taste the beer in this cake, but it doesn't taste like drinking a beer! It simply adds a rich and hearty element to the cake - a slight bitterness to complement the sweet treacle.


I made quite a small cake for this one - as I was only having a couple of people over to help me eat it. It was so nice that I probably wouldn't have minded a full sized one, it would have meant that I had lots of leftovers! But probably best that I didn't! It doesn't rise much and makes quite a flat and dense cake. This is perfect really, because you only need fairly small slices (each slice packs a flavour punch!). I made it to fit a small 20cm diameter cake tin. If you want a full sized cake then you'll probably want to make about three times the recipe.


Hollandse Stroopkoek
Adapted from godutch.com
Ingredients
1 cup wholemeal flour
1  tsp baking powder
1 1/2 tsp allspice
1/2 tsp salt
1 tbsp treacle or stroop
1/4 cup Nuttelex (or other vegan marg)
3/4 cup beer
80g raisins
50g currants
1/3 cup walnuts
2 tbsp slivered almonds

To Make
1. Preheat the oven to 180 degrees.
2. Combine the flour, baking powder, allspice and salt in a large bowl.
3. Place the treacle and Nuttelex in a small saucepan and melt over a low heat until completely melted. Remove from the heat and gradually mix in the beer.
4. Add the beer mixture to the flour gradually, stirring.
5. Stir the raisins, currants, walnuts and almonds through the batter until evenly distributed.
6. Grease and line a 20cm diameter cake tin and pour in the batter.
7. Bake for 40 minutes, or until a knife inserted into the centre comes out clean.
8. To serve, sprinkle with icing sugar.

Makes 1 x 20cm diameter cake. I recommend serving with a cup of tea!


This month I'm featuring lots of delicious food from The Netherlands.
Check out my other Dutch recipe posts:

Thursday, 25 April 2013

Speculaas - Dutch Spiced Biscuits


Dutch month is all about spices. What's that I hear you say? You love cinnamon, nutmeg, cloves, pepper, cardamom and ground ginger? Well, you have come to the right place because all those things are in abundance on the blog this month. When The Netherlands was requested by a reader to be my next featured country, I knew immediately I had to make some speculaas! Firstly because they're so special, secondly because they're so quintessentially Dutch and thirdly, because typically they're often already vegan - so easy peasy!

You'll notice, however, that my speculaas aren't the fabulous windmill shape of the ones you buy in the supermarket. I wish! You can buy wooden moulds designed specifically for making your speculaas into wonderful Dutch shapes - called a Speculaasplank. I looked at a couple on the internet, but sadly they don't come cheap so I had to give them a miss. Instead I cut mine into cute shapes and decorated them with almonds, not quite as cool as intricate windmills - but they tasted just as good!


Dutch Speculaas
Adapted from godutch.com

Ingredients
2 cups wholemeal flour
1/2 tsp baking powder
1/2 cup brown sugar
2 tsp ground cinnamon
1 tsp ground ginger
2/3 tsp nutmeg
1/4 tsp cloves
1/4 tsp cardamom
1/4 tsp ground pepper (optional, not included in many traditional recipes, but I love it!)
1 cup vegan margarine (nuttelex)
2 tbsp rice milk (or other non dairy milk), plus more if needed
Slivered almonds, to decorate

To Make
1. Combine the flour, sugar, baking powder and all the spices in a big bowl.
2. Cut the margarine into the flour mix and rub with your fingers until it forms a fine bread crumb like mix.
3. Add the milk and knead with your hands until it forms a dough. If it's too dry to form a ball, then add a little more milk. Form into a ball and then wrap in plastic wrap and leave in the fridge overnight for the spices to penetrate into the dough.
4. Preheat the oven to 180 degrees.
5. Sprinkle your benchspace with plenty of flour and dust your rolling pin. Cut your ball of dough in half and roll out one of the halves about 2/3 cm thick. Use shaped biscuit cutters and then place them on a baking tray lined with baking paper.
6. Decorate the tops of the biscuits with slivered almonds and bake for 15-18 minutes. Continue until you've used up all the dough. You'll probably need to bake 2-3 batches to get through them all.
7. Once baked, cool on a cooling rack.


I forgot to count how many biscuits it made! Bad blogger! :(
I think it made about 30. But that will depend on the size of your biscuit cutter.

As you can see, I made most of mine with a heart shaped cutter - but I also made a few of these cute cat shaped ones!


This month I'm featuring lots of delicious food from The Netherlands.
Check out my other Dutch recipe posts:

Wednesday, 17 April 2013

Peek-a-Pear Tart (Vegan & Sugar Free) PLUS Cookbook Giveaway


I've been featuring Dutch recipes this month (when I've managed to get around to it, as I've been a bit behind on posting this month!) and what I've found, apart from lots of delicious spiced cakes, biscuits and bread, is a whole list of dishes with adorably cute names. Like the other day I posted a dish called "Naked Babies in the Grass", a name which - quite frankly- made me insanely happy. I've also posted some Lazybones Buns, another great name! So, even though I invented this dish myself, I thought I'd have a go at giving it a cute name in honour of Dutch food month. You can keep your eye on the blog for the rest of the month too, as I have a couple of other Dutch dishes with lovely names to post as well.

This lovely dish came about when a patient of mine turned up to her appointment bearing a big bag of luscious pears from her tree, I love my job! I also love seasonal produce, which is the theme of this month's Sweet Adventure's Blog Hop. So I thought it would be a perfect time to share the pear tart which I made with my big bag of wonderful fresh pears. I made it sugar free, using a peach that I had lying around the house for extra sweetness (because I love experimenting with stuff that I find lying around). It was delicious and quite frankly I felt damn healthy and totally guilt free eating it!


But wait!!! There is actually more!

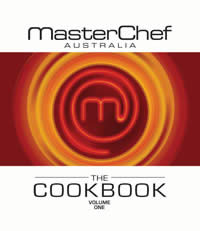
I'm giving away a shiny brand new copy of the Masterchef Australia Cookbook! This is the first volume of the book and is a fantastic book for cooks of all levels. It's perfect for beginner cooks, because it talks a lot about cooking techniques and how to hone your skills to perfection. But it's also great for accomplished cooks looking for a challenge. Including spectacular Adriano Zumbo recipes such as Chocolate Mousse cake, Vanilla Pannacotta and a superb croquembouche. Unbelievably delicious stuff! To enter the giveaway just checkout the details below.


Disclaimer - I'm sure somebody will come out with criticism because I've labelled this sugar free but obviously the fruit contains sugar. In my opinion a dish is sugar free if I haven't added any sugars myself (cane sugar, coconut sugar, rapidura sugar, honey, maple syrup, agave nectar or any other type of sugar) but I'm simply relying on the natural sweetness of fruit.


And now... the actual tart!

Ingredients
4 dried dates
1/4 cup rolled oats
1/4 cup blanched almonds
2 tbsp self raising flour
1 ripe peach
Pinch of cinnamon
Pinch of nutmeg
500g ripe pears
1 tbsp lemon juice

To Make
1. Preheat the oven to 180 degrees.
2. Soak the dried dates in 1-2 tbsp hot water for 5-10 minutes.
3. To make the base: Place the oats, almonds, flour and spices in a food processor and process to form a coarse meal. Drain the dates (keep the liquid aside).
4. Add the dates and the sliced peach to the food processor and process until well combined. It should form a thick ball of dough which is not too sticky to touch, but moist enough to stay together and not be crumbly. However, the actual consistency may vary depending on the juiciness of the peach you use.If it is too sticky, add a little more flour, if it is too crumbly and dry add a little of the date soaking water until you get the consistency just right.
5. Grease a tart tin with a removable base and line the bottom with baking paper. Press the base down in an even layer all over the bottom of the tart tin. Press it down and smooth it out with the back of a spoon and then bake it in the oven for 10 minutes (keep an eye on it to make sure it doesn't get brown on top).
6. Remove from the oven and allow to cool, meanwhile reduce the oven temperature to about 170. While it is cooling, take about 1/4 cup of chopped, peeled pear and place it in your food processor with 1 tsp water and the tbsp lemon juice. Purée until it is a smooth liquid. Set this aside and get slicing the rest of your pears (no need to remove the skin this time!).
7. Arrange the sliced pears over the base and brush the top with the pear and lemon puree. Put it back in the oven and bake for 15-20 minutes, or until the pears are tender to pierce with a knife.
8. Serve hot (preferably with a big scoop of vanilla soy ice cream - although that will negate the 'healthy' and 'sugar free' aspects of this dessert! Do it anyway though...)

Serves 6-8.


a Rafflecopter giveaway

Sunday, 14 April 2013

Naked Babies in the Grass Recipe (Naakte Kindertjes in Het Gras)


Have you ever come across a dish with a cuter name? If you have I want you to tell me about it in the comments! This Dutch dish is called Naakte Kindertjes in Het Gras - which translates as Naked Babies in the Grass. I'll admit, the adorable name is the main reason I decided to feature this dish. It's a simple but satisfying dish, well suited to being a side dish or an addition to a buffet or potluck. You can see where it gets it's name right? The little white beans are like tiny babies nestled amongst very tall grass.

You can make this dish using any small white beans, such as navy, great northern or cannelini beans. I guess if you wanted to make it with lima beans you could call it Fat Naked Babies in the Grass! What I'm putting up here are some rough quantities, as you don't really need to follow the recipe too closely. I made a fairly big quantity as I was serving it up at a dinner party, so you'll probably want to halve it to make a side dish for a family of four. Use whatever quantities you like!

Now tell me - what is the most adorably named dish you have ever come across??

Ingredients
300g dried white beans, soaked for 24 hours
500g green beans, trimmed and cut in half
2 tbsp vegan margarine (Nuttelex)
Salt and Pepper to taste

To Make
1. Soak the white beans for 24 hours and then drain and rinse. Place in a large pot and cover with plenty of water. Bring to a boil and boil until cooked (times may vary between different types of beans - but I used cannelini beans and it took about 50 minutes).
2. In the last 10 minutes of cooking add the green beans so that they'll be just tender but still a bit crunchy.
3. While they're cooking. Heat up your serving bowl with some boiling hot water.
4. Drain the beans and tip the water out of your serving bowl.
5. Add the hot beans, Nuttelex and generous amounts of salt and pepper to the warm bowl and toss it all together. Serve straight away (if you have to make it it advance, make sure you heat it up before serving to make sure the Nuttelex is properly melted).

Serves 8-12 as a side dish.


I entered this dish into the Vegan Virtual Linky Potluck.


This month I'm featuring lots of delicious food from The Netherlands.
Check out my other Dutch recipe posts: